ButterFly主题配置
一、主页设置
1.1 导航菜单
导航菜单
设置如下_config.yml
1
2
3
4
5
6
7
8
9
10
menu: 首页: / || fas fa-home 时光轴: /archives/ || fas fa-archive 标签: /tags/ || fas fa-tags 分类: /categories/ || fas fa-folder-open 友链: /link/ || fas fa-link 关于: /about/ || fas fa-heart
必须是/xxx/,后面||分开,然后写图标名。
默认子目录是展开的,如果你想要隐藏,在子目录里添加hide
1 List||fas fa-list||hide: Music: /music/ || fas fa-music Movie: /movies/ || fas fa-video
标签页
1
2
hexo new page tags # source /tags/index.md
1
2
3
4
5
--- title: 标签 date: 2018-01-05 00:00:00 type: "tags" ---
分类页
1
2
hexo new page categories # source /categories/index.md
1
2
3
4
5
--- title: 分类 date: 2018-01-05 00:00:00 type: "categories" ---
友情链接
1
2
hexo new page link # source /link/index.md
1
2
3
4
5
--- title: 友情链接 date: 2018-06-07 22:17:49 type: "link" ---
在Hexo博客目录中的source/_data(如果没有_data 文件夹,请自行创建),创建一个文件link.yml
1 - class_name: 网站class_desc:值得推荐的网站link_list: - name: Youtube link: https://www.youtube.com/ avatar: https://i.loli.net/2020/05/14/9ZkGg8v3azHJfM1.png descr:视频网站- name: Weibo link: https://www.weibo.com/ avatar: https://i.loli.net/2020/05/14/TLJBum386vcnI1P.png descr:中国最大社交分享平台- name: Twitter link: https://twitter.com/ avatar: https://i.loli.net/2020/05/14/5VyHPQqR6LWF39a.png descr:社交分享平台
class_name和 class_desc 支持html 格式书写,如不需要,也可以留空。
友情链接界面可以由用户自己自定义,只需要在友情链接的md档设置就行,以普通的Markdown格式书写。
搜索系统
记得运行hexo clean
hexo-generator-search
1 npm install hexo-generator-search --save
1 2 3 local_search: enable: true
1.2 社交图标
1 2 3 4 5 6 7 8 social: CSDN: https://blog.csdn.net/weixin_44543463 || fab fa-cuttlefish GitHub: https://github.com/HuffieMa || fab fa-github E-Mail: mailto:haofei_ma@163.com || fa fa-envelope 知乎: https://www.zhihu.com/people/ma-hao-fei-2 || fab fa-zhihu
1.3 网站图像
网站图标与头像
1 2 3 4 5 6 7 favicon: /img/favicon.png avatar: img: /img/avatar.jpg effect: false
顶部图
设置顶部图
配置
解释
index_img
主页的top_img
default_top_img
默认的top_img,当页面的top_img 没有配置时,会显示default_top_img
archive_img
归档页面的top_img
tag_img tag
子页面的默认top_img
tag_per_img
tag 子页面的top_img,可配置每个tag 的top_img
category_img
category 子页面的默认top_img
category_per_img
category 子页面的top_img,可配置每个category 的top_img
并不推荐为每个tag 和每个category 都配置不同的顶部图,因为配置太多会拖慢生成速度
1
2
3
4
5
6
tag_per_img aplayer: https://xxxxxx.png android: ddddddd.png category_per_img 随想: hdhdh.png 推荐: ddjdjdjd.png
1 2 3 4 5 index_site_info_top: index_top_img_height:
1.4 主页文章设置
文章信息
1
2
3
4
5
6
7
8
9
10
11
12
13
post_meta: page: date_type: created date_format: date categories: true tags: true label: true post: date_type: both date_format: date categories: true tags: true label: true
文章简介
在butterfly里,有四种可供选择
description:只显示description
both :优先选择description,如果没有配置description,则显示自动节选的内容auto_excerpt:只显示自动节选
false:不显示文章内容
1 2 3 4 5 6 7 8 9 index_post_content: method: 2 length: 500
文章封面
1
2
3
4
5
6
7
8
9
10
cover: index_enable: true aside_enable: true archives_enable: true position: both default_cover: https://img.mahaofei.com/img/linux_debian.jpg
1.5 字数统计
npm install hexo-wordcount --save
1
2
3
4
5
wordcount: enable: true post_wordcount: true min2read: true total_wordcount: true
1.6 页脚设置
博客年份
展示你站点起始时间的选项。它位于页面的最底部。
1 2 3 4 5 6 7 8 9 footer: owner: enable: true since: 2021 custom_text: <a href="https://beian.miit.gov.cn"><img class="icp-icon" src="/img/icp.png"><span>津ICP备2021000769号-2</span></a> copyright: true
百度统计
1 2 3 baidu_analytics: 439a0d0abeb31dd8f338efd8266c999b
页脚背景
1.7 侧边栏设置
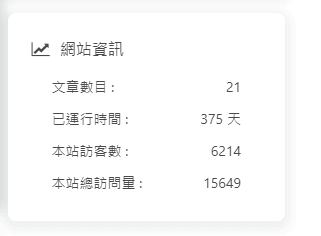
1 2 3 4 5 6 7 8 9 10 11 12 13 14 15 16 17 18 19 20 21 22 23 24 25 26 27 28 29 30 31 32 33 34 35 36 37 38 39 40 41 42 43 44 45 46 enable: true hide: false button: true mobile: true position: left card_author: enable: true description: button: enable: true icon: fab fa-cuttlefish text: CSDN欢迎关注 link: https://blog.csdn.net/weixin_44543463 card_announcement: enable: true content: 毕设ing!! card_recent_post: enable: true limit: 5 sort: date sort_order: card_categories: enable: true limit: 8 expand: none sort_order: card_tags: enable: true limit: 40 color: false sort_order: card_archives: enable: true type: monthly format: MMMM YYYY order: -1 limit: 8 sort_order: card_webinfo: enable: true post_count: true last_push_date: true sort_order:
二、文章设置
2.1 代码设置
代码高亮
Butterfly支持6种代码高亮样式:
darker
pale night
light ocean
mac
mac light
具体样式参考官方文档
代码复制
代码展开关闭
在默认情况下,代码框自动展开,可设置是否所有代码框都关闭状态,点击>可展开代码
1 2 3 4 highlight_shrink: true
代码高度限制
可配置代码高度限制,超出的部分会隐藏,并显示展开按钮。
1 highlight_height_limit: false
2.2 文章复制设置
1 2 3 4 5 6 7 copy: enable: false copyright: enable: false limit_count: 50
配置
解释
enable
是否开启网站复制权限
copyright
复制的内容后面加上版权信息
enable
是否开启复制版权信息添加
limit_count
字数限制,当复制文字大于这个字数限制时,将在复制的内容后面加上版权信息
2.3 文章目录
在文章页,会有一个目录,用于显示TOC。
1 2 3 4 5 6 toc: post: true page: false number: true expand: false style_simple: false
主题会优先判断文章Markdown的Front-matter是否有配置,如有,则以Front-matter的配置为准。否则,以主题配置文件中的配置为准
2.4 文章打赏
1 2 3 4 5 6 7 8 9 10 reward: enable: true QR_code: - img: /img/wechatpay.png link: text: 微信支付 - img: /img/alipay.jpg link: text: 支付宝
2.5 下一篇文章
2.6 文章分享
1 2 3 4 5 sharejs: enable: true sites: qq,wechat,weibo,facebook,twitter
在 head 里添加一些meta资料,例如缩略图、标题、时间等。当分享网页到一些平台时,平台会读取 Open Graph 的内容,展示缩略图,标题信息等等
2.7 数学公式MathJax
mathjax 是一个开源的 web 数学公式渲染器,由 JS 编写而成,它提供的书写方式和 LaTeX 的书写方式一样。
(1)更换渲染插件
Hexo 默认的渲染引擎是 marked,但 marked 不支持 mathjax,所以需要更换渲染引擎为 hexo-renderer-kramed,主要步骤如下:
1 2 npm uninstall hexo-renderer-marked --save # 卸载 marked npm install hexo-renderer-kramed --save # 安装 kramed
停用 hexo-math 并安装 mathjax
1 2 npm uninstall hexo-math --save # 卸载 hexo-math npm install hexo-renderer-mathjax --save # 安装 mathjax
打开 /node_modules/hexo-renderer-kramed/lib/renderer.js,进行如下修改:
1 2 3 4 5 6 // Change inline math rule function formatText(text) { // Fit kramed's rule: $$ + \1 + $$ - return text.replace(/`\$(.*?)\$`/g, '$$$$$1$$$$'); + return text; }
更新 Mathjax 配置文件,打开 /node_modules/hexo-renderer-mathjax/mathjax.html,将最后一行的 <script> 改为:
1 <script src="https://cdnjs.cloudflare.com/ajax/libs/mathjax/2.7.1/MathJax.js?config=TeX-MML-AM_CHTML" ></script>
更改默认转义规则,因为 LaTeX 与 markdown 语法有语义冲突,所以 hexo 默认的转义规则会将一些字符进行转义,我们需要对默认的规则进行修改。打开 \node_modules\kramed\lib\rules\inline.js ,将var inline = {} 中的属性 escape 和 em 参数更改如下:
1 escape : /^\\([`*\[\]()#$+\-.!_>])/ ,
1 em : /^\*((?:\*\*|[\s\S])+?)\*(?!\*)/ ,
开启 mathjax,打开主题的 _config.butterfly.yml ,检索 MathJax,将 enable 参数设置为 true
1 2 3 4 mathjax: enable: true per_page: false
配置成功后,需要渲染的文章开头,添加参数 mathjax: true 即可。
三、博客美化
3.1 背景canvas_nest
1 2 3 4 5 6 7 canvas_nest: enable: true color: '0,0,255' opacity: 0.7 zIndex: -1 count: 99 mobile: false
3.2 打字烟花特效
1 2 3 4 5 6 7 activate_power_mode: enable: true colorful: true shake: true mobile: false
3.3 页面美化
1 2 3 4 5 6 beautify: enable: true field: site title-prefix-icon: '\f0c1' title-prefix-icon-color: "#F47466"
3.4 网站副标题打字效果
1 2 3 4 5 6 7 8 9 10 11 12 13 14 15 16 subtitle: enable: true effect: true loop: true source: 1 sub:
3.5 访问人数busuanzi
1 2 3 4 busuanzi: site_uv: true site_pv: true page_pv: true
3.6 运行时间
1 2 3 4 5 6 runtimeshow: enable: true publish_date: 2021 /01/16 23 :30:32
3.7 夜间模式
1 2 3 4 5 darkmode: enable: true button: true autoChangeMode: false
配置项
说明
autoChangeMode: 1
跟随系统而变化,不支持的浏览器/系统将按照时间晚上6点到早上6点之间切换为dark mode
autoChangeMode: 2
只按照时间晚上6点到早上6点之间切换为dark mode,其余时间为light mode
autoChangeMode: false
取消自动切换
3.8 阅读模式
阅读模式下会去掉除文章外的内容,避免干扰阅读。
只会出现在文章页面,右下角会有阅读模式按钮。
3.9 页脚添加Github-badge标签
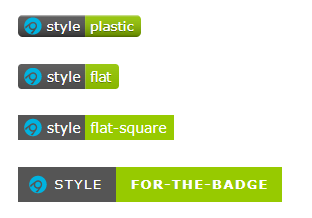
首先到https://shields.io/ 这个徽标生成网站生成Github-badge徽标。
具体方法见网页,标签中用到的图标可以从simpleicons 查询。
生成的链接都是这样的 → https://img.shields.io/badge/Hosted-Github-brightgreen?style=flat&logo=GitHub
1 2 3 4 5 6 7 8 9 10 11 12 13 14 15 16 17 18 19 20 21 22 23 <p > <a style ="margin-inline:5px" target ="_blank" href ="https://github.com/" > <img src ="https://img.shields.io/badge/Hosted-Github-brightgreen?style=flat&logo=GitHub" title ="本站项目由Gtihub托管" > </a > <a style ="margin-inline:5px" target ="_blank" href ="https://hexo.io/" > <img src ="https://img.shields.io/badge/Frame-Hexo-blue?style=flat&logo=hexo" title ="博客框架为Hexo" > </a > <a style ="margin-inline:5px" target ="_blank" href ="https://butterfly.js.org/" > <img src ="https://img.shields.io/badge/Theme-Butterfly-6513df?logoColor=white&style=flat&logo=buefy" title ="主题采用butterfly" > </a > <a style ="margin-inline:5px" target ="_blank" href ="https://aliyun.com/product/cdn" > <img src ="https://img.shields.io/badge/CDN-%E9%98%BF%E9%87%8C%E4%BA%91-orange?style=flat&logo=alibabacloud" title ="本站使用阿里云为静态资源提供CDN加速" > </a > <a style ="margin-inline:5px" target ="_blank" href ="https://beian.miit.gov.cn/" > <img src ="https://img.shields.io/badge/%E6%B4%A5ICP%E5%A4%87-2021000769%E5%8F%B7--2-red?logo=data:image/png;base64,iVBORw0KGgoAAAANSUhEUgAAAB4AAAAdCAYAAAC9pNwMAAABS2lUWHRYTUw6Y29tLmFkb2JlLnhtcAAAAAAAPD94cGFja2V0IGJlZ2luPSLvu78iIGlkPSJXNU0wTXBDZWhpSHpyZVN6TlRjemtjOWQiPz4KPHg6eG1wbWV0YSB4bWxuczp4PSJhZG9iZTpuczptZXRhLyIgeDp4bXB0az0iQWRvYmUgWE1QIENvcmUgNS42LWMxNDIgNzkuMTYwOTI0LCAyMDE3LzA3LzEzLTAxOjA2OjM5ICAgICAgICAiPgogPHJkZjpSREYgeG1sbnM6cmRmPSJodHRwOi8vd3d3LnczLm9yZy8xOTk5LzAyLzIyLXJkZi1zeW50YXgtbnMjIj4KICA8cmRmOkRlc2NyaXB0aW9uIHJkZjphYm91dD0iIi8+CiA8L3JkZjpSREY+CjwveDp4bXBtZXRhPgo8P3hwYWNrZXQgZW5kPSJyIj8+nhxg7wAACNlJREFUSInF1mmMVeUdx/Hv2e+5+519mJWBYQZkGxZZxLKJqBXGoLS1iXWrmihotFXaJiTWWlsbl6q1aetWd5u0VkKjNG4YEJSlOCibDLMwM8x679z9nnPP1jcVJUxf+7z6J8+LT37/Z4VvaQhfFS8+sBXbctCDGrVTKlBUH4mxAbI9Hfj0IJLsp6paJ5/tmn20N/D0wKDRMq9F/c3M2U1/V0vDfWMFh+tv/Ig1zYPMabDImPJ52OaXO87W580KggCiiOsJOJ6I3wcNFaaeNKxrt72f2fLGu4FpJ/sDQABRzD22fH7/Yze069vGc6mrDLNIJCDik10sxz2by3VdPM87xzkP9jwPTZFRVI1YUJKH+oy7n3tbvv/P2wW/UQxRWe6w4ZJRptYLHDoCuz8v5cP92XbI762O+h6UVWHnUFbPpU0fEb2A60mMJ7MUi9b/b7UgKhiZMaIxm8YLplLMDPz8hl/EH+rs8TNlUpFf32uyZJGLPDwCiTGUyTWodTN49eUCdz2YwXb9NNcObp1X98WDoufynzMVCEKGn27ayPTWBi5ad8P5iQUkJEnFLjqM9Z+hrVX0vfDe6K2dPRWsW2bwyp9EUifSJB84gdxrkR0eRgv1o/3I4fbbprJ6scqamzVO9pffec1S5ZWY2Nfz5qEy/FqOC2Y3s3j53HMSi18VRjFPwSwg+1RfVbl115vvJrsfej7UGIsYPPGgQ7JXoO+Xx5B3dHEomyJ9x1qiQozkr95h5937aFnVyouPlgJK+Ss7Fxz64OTSxSX+LHYxT2IsRW5kbGI4oHcR0jqoqTjV9se3I7/f8rS/ClS23GxSXhph6L5d9Akm7qqZhHWBQGUJ+CWGFzcg7e7m6D3/ZuW1Ea5YKdA3EojuONi813TqNi+YPYOKUhXDtCeGL26/hakLLiEcdsaHRkRAoLRc4fJrmhnekyF0apgZowWSwwkaa+rw3f8WA1GZZsPP5JEChX8dhZTN6iU6kAcs5s+dHd183SJ0VVKL57pfw6YdRQw23aeWTns47DPTALWlRTR7kMLew6hGgYqUhWXYFFUdPZ6lUBahLA8hVcOftckfi7No7VRAAQqsX1dybfvG1qwriM9mM5mJ4e4jO5Cc01dPqixbr8tWGBQUL4vjGigEEShi+xUmZ2RiR/sJ1pbS8NkgZrKAGw0TsgQsQyFaF/nfYTGprAlMFysbA1pI3mhkR6snhGsaymYGvPyFEb9IdbUE2AzFFTwpRqCtBY0wmdER+hZW4j63gcJj38V+/ErSUZXsYBfjIZHIRW0c2Z8BskCAqN+CbBJBFnyyKjR+Ez57nBxLqpfMUeSISElMBFz6x2Q6OxzWrYjyxWVzEewioU3LCS5vQY6nMUrLwNaxXvoQ59IloFSx54PPAZtQLExVZZDxsVE8J4dn6v4JYatgbSjk0owPw7RGH2ADMo88Z7L20ip8f7gC7fAo0q4+0rt7kEQDvaghVZbiPHUHcyeXcfLjT3jmpR7AYsnSScya3UR8bARVMck7Y/cB75/X6rDf3Fg2dw2jKZm5dXGm1LuAzO5DCo9v6aT0ibco5kzOvLOP+NGTFJtDpPYeZKijk/Rn3QxsfZV7txwhX7ABiZUXBsGvIvguQApNQQva9RMmTvZ2dpVUls+tX/UD7GN/Y8Ws05w6rQF+9vyzg1vZjbvMRJhXiRSU8DpTFFe0QE8S6SfPkOkZoktrB2oAhZWrwljxOPmchiSMYOWNoxNuruFU5vWeXdsojiUon345113dBBQBmTYlTimgdB8nfPo4WjaNFgN9OMEkJ02dnadVt5ki54Esqy+bzKJltVhSPbI3iN2zCyMTeXNCuG7Omm2Zok7PR2+R7jvD8ouruHhmCrB5jVZeYxLdrTP4sr4Vtd9g4MA4qc4c+6cu5NPamfw4P59t2WrA4YdXKkASf7SFivo6PDdEPmf1fRM++zp1bH/0r4I1dD1ODtOWaW4IsvPjL7nqXhloQiSPwjjgMYkMASyGEBkjhISCQwkwzve/18AbT+pk8pVY4UacQi9y+gyZ0eRAw4qHa89LXEx1LXMSPfhDJYRb59BtlLKg2WPT2l6qYl1svtGkrLYckyA1S+t5+2ATm37WCui0LSynsckDNH5zTxAchbQtkx08hDHYiW6NgC0enHBzEZ102UDH8QORdEckjEzZrNWkRydzyx17uGnDXqbUnGZ6dRPjSY91q2TqwjFuvTxLo5Zn5Qo/pumRSFcTLQtybEhGE0fQrDhhJ0VvH2lTnnHPhGtsmWan469apERjI2MH3qN7+7MEfH6ql29CbV7PvsMG32k6yU2XDhEKyZw66eJaRdrXR7CzCcqUNC3zwgymPJRCH4KRRLINimpL14A5Y4GDeOqbsPRVcfuN7Xj44pav/hFfrNT2kr2rsqf2Ibp5pEA14ZIImUyW3t5REkkTXRGQ/DGGhtLginhqCWknQDE5hKf5UFSF9Lj020Q2ul5V1AR2hr+8vuP8Vlc2zMPRxoSjnx7XBC14sDoydahSGq7KdO/HFyrBchxCVfX4fDKp4T7SCQejYODZLrYgIqgKFsNIgQqEYob8mW6yiUyb7Z64LVK/+B85xznnJ3AWzqTzuIX46mr5wLs+UUTyIriBCjRNxguHMJIFDLEEvXEOVRWnSJ0+jCd4CJoGjoedM1CLcXQziW3nMV2TSMBeOx7vWZvPt1r+cMPzE8KunaUkFn0vNrvtqXj34c1W6gzxlEQ6naIoBahtnkMwoFMwIVzSRNguMt53Aj2s4nkSlgPoGqLkICsRNF0gl8rYWuP8+11/w/OOJDEhHPKLCIpOXmi+M9AgP+maiesLifF2T1Rn5ZNj5Lo/Qc/GcPMmhdoqlEgIGzCK4PiCmJKK68p4KfF3qYGuF0qCRUkJTzleUbvQyWRTuE5xYthxQbBs7EISAbkzUFG3VfXXbK2YFi3X/eryfKKnqVBItNjJxDzH8erddC4SqWwcN5WyTtlyO1RP/Lh3eHD76MB40swmiDVJyDLYRhpc5+ub6tse/wWKbvSQEAw1awAAAABJRU5ErkJggg==" title ="备案号:津ICP备-2021000769号--2" > </a > <a style ="margin-inline:5px" target ="_blank" href ="https://tongji.baidu.com/web/10000399748/overview/index?siteId=17522448" > <img src ="https://img.shields.io/badge/%E7%99%BE%E5%BA%A6-%E7%BB%9F%E8%AE%A1-blue?style=flat&logo=baidu" title ="本站采用百度统计进行网站管理与维护" > </a > <a style ="margin-inline:5px" target ="_blank" href ="http://creativecommons.org/licenses/by-nc-sa/4.0/" > <img src ="https://img.shields.io/badge/Copyright-BY--NC--SA%204.0-d42328?style=flat&logo=Claris" title ="本站采用知识共享署名-非商业性使用-相同方式共享4.0国际许可协议进行许可" > </a > </p >
到HTML压缩网站 将代码压缩成一行,复制到footer属性中就完成Github-badge效果了
1 2 3 4 5 6 7 8 footer: owner: enable: false since: 2021 custom_text: <p><a style="margin-inline:5px"target="_blank"href="https://github.com/"><img src="https://img.shields.io/badge/Hosted-Github-brightgreen?style=flat&logo=GitHub"title="本站项目由Gtihub托管"></a><a style="margin-inline:5px"target="_blank"href="https://hexo.io/"><img src="https://img.shields.io/badge/Frame-Hexo-blue?style=flat&logo=hexo"title="博客框架为Hexo"></a><a style="margin-inline:5px"target="_blank"href="https://butterfly.js.org/"><img src="https://img.shields.io/badge/Theme-Butterfly-6513df?logoColor=white&style=flat&logo=buefy"title="主题采用butterfly"></a><a style="margin-inline:5px"target="_blank"href="https://aliyun.com/product/cdn"><img src="https://img.shields.io/badge/CDN-%E9%98%BF%E9%87%8C%E4%BA%91-orange?style=flat&logo=alibabacloud"title="本站使用阿里云为静态资源提供CDN加速"></a><a style="margin-inline:5px"target="_blank"href="https://beian.miit.gov.cn/"><img src="https://img.shields.io/badge/%E6%B4%A5ICP%E5%A4%87-2021000769%E5%8F%B7--2-red?logo=data:image/png;base64,iVBORw0KGgoAAAANSUhEUgAAAB4AAAAdCAYAAAC9pNwMAAABS2lUWHRYTUw6Y29tLmFkb2JlLnhtcAAAAAAAPD94cGFja2V0IGJlZ2luPSLvu78iIGlkPSJXNU0wTXBDZWhpSHpyZVN6TlRjemtjOWQiPz4KPHg6eG1wbWV0YSB4bWxuczp4PSJhZG9iZTpuczptZXRhLyIgeDp4bXB0az0iQWRvYmUgWE1QIENvcmUgNS42LWMxNDIgNzkuMTYwOTI0LCAyMDE3LzA3LzEzLTAxOjA2OjM5ICAgICAgICAiPgogPHJkZjpSREYgeG1sbnM6cmRmPSJodHRwOi8vd3d3LnczLm9yZy8xOTk5LzAyLzIyLXJkZi1zeW50YXgtbnMjIj4KICA8cmRmOkRlc2NyaXB0aW9uIHJkZjphYm91dD0iIi8+CiA8L3JkZjpSREY+CjwveDp4bXBtZXRhPgo8P3hwYWNrZXQgZW5kPSJyIj8+nhxg7wAACNlJREFUSInF1mmMVeUdx/Hv2e+5+519mJWBYQZkGxZZxLKJqBXGoLS1iXWrmihotFXaJiTWWlsbl6q1aetWd5u0VkKjNG4YEJSlOCibDLMwM8x679z9nnPP1jcVJUxf+7z6J8+LT37/Z4VvaQhfFS8+sBXbctCDGrVTKlBUH4mxAbI9Hfj0IJLsp6paJ5/tmn20N/D0wKDRMq9F/c3M2U1/V0vDfWMFh+tv/Ig1zYPMabDImPJ52OaXO87W580KggCiiOsJOJ6I3wcNFaaeNKxrt72f2fLGu4FpJ/sDQABRzD22fH7/Yze069vGc6mrDLNIJCDik10sxz2by3VdPM87xzkP9jwPTZFRVI1YUJKH+oy7n3tbvv/P2wW/UQxRWe6w4ZJRptYLHDoCuz8v5cP92XbI762O+h6UVWHnUFbPpU0fEb2A60mMJ7MUi9b/b7UgKhiZMaIxm8YLplLMDPz8hl/EH+rs8TNlUpFf32uyZJGLPDwCiTGUyTWodTN49eUCdz2YwXb9NNcObp1X98WDoufynzMVCEKGn27ayPTWBi5ad8P5iQUkJEnFLjqM9Z+hrVX0vfDe6K2dPRWsW2bwyp9EUifSJB84gdxrkR0eRgv1o/3I4fbbprJ6scqamzVO9pffec1S5ZWY2Nfz5qEy/FqOC2Y3s3j53HMSi18VRjFPwSwg+1RfVbl115vvJrsfej7UGIsYPPGgQ7JXoO+Xx5B3dHEomyJ9x1qiQozkr95h5937aFnVyouPlgJK+Ss7Fxz64OTSxSX+LHYxT2IsRW5kbGI4oHcR0jqoqTjV9se3I7/f8rS/ClS23GxSXhph6L5d9Akm7qqZhHWBQGUJ+CWGFzcg7e7m6D3/ZuW1Ea5YKdA3EojuONi813TqNi+YPYOKUhXDtCeGL26/hakLLiEcdsaHRkRAoLRc4fJrmhnekyF0apgZowWSwwkaa+rw3f8WA1GZZsPP5JEChX8dhZTN6iU6kAcs5s+dHd183SJ0VVKL57pfw6YdRQw23aeWTns47DPTALWlRTR7kMLew6hGgYqUhWXYFFUdPZ6lUBahLA8hVcOftckfi7No7VRAAQqsX1dybfvG1qwriM9mM5mJ4e4jO5Cc01dPqixbr8tWGBQUL4vjGigEEShi+xUmZ2RiR/sJ1pbS8NkgZrKAGw0TsgQsQyFaF/nfYTGprAlMFysbA1pI3mhkR6snhGsaymYGvPyFEb9IdbUE2AzFFTwpRqCtBY0wmdER+hZW4j63gcJj38V+/ErSUZXsYBfjIZHIRW0c2Z8BskCAqN+CbBJBFnyyKjR+Ez57nBxLqpfMUeSISElMBFz6x2Q6OxzWrYjyxWVzEewioU3LCS5vQY6nMUrLwNaxXvoQ59IloFSx54PPAZtQLExVZZDxsVE8J4dn6v4JYatgbSjk0owPw7RGH2ADMo88Z7L20ip8f7gC7fAo0q4+0rt7kEQDvaghVZbiPHUHcyeXcfLjT3jmpR7AYsnSScya3UR8bARVMck7Y/cB75/X6rDf3Fg2dw2jKZm5dXGm1LuAzO5DCo9v6aT0ibco5kzOvLOP+NGTFJtDpPYeZKijk/Rn3QxsfZV7txwhX7ABiZUXBsGvIvguQApNQQva9RMmTvZ2dpVUls+tX/UD7GN/Y8Ws05w6rQF+9vyzg1vZjbvMRJhXiRSU8DpTFFe0QE8S6SfPkOkZoktrB2oAhZWrwljxOPmchiSMYOWNoxNuruFU5vWeXdsojiUon345113dBBQBmTYlTimgdB8nfPo4WjaNFgN9OMEkJ02dnadVt5ki54Esqy+bzKJltVhSPbI3iN2zCyMTeXNCuG7Omm2Zok7PR2+R7jvD8ouruHhmCrB5jVZeYxLdrTP4sr4Vtd9g4MA4qc4c+6cu5NPamfw4P59t2WrA4YdXKkASf7SFivo6PDdEPmf1fRM++zp1bH/0r4I1dD1ODtOWaW4IsvPjL7nqXhloQiSPwjjgMYkMASyGEBkjhISCQwkwzve/18AbT+pk8pVY4UacQi9y+gyZ0eRAw4qHa89LXEx1LXMSPfhDJYRb59BtlLKg2WPT2l6qYl1svtGkrLYckyA1S+t5+2ATm37WCui0LSynsckDNH5zTxAchbQtkx08hDHYiW6NgC0enHBzEZ102UDH8QORdEckjEzZrNWkRydzyx17uGnDXqbUnGZ6dRPjSY91q2TqwjFuvTxLo5Zn5Qo/pumRSFcTLQtybEhGE0fQrDhhJ0VvH2lTnnHPhGtsmWan469apERjI2MH3qN7+7MEfH6ql29CbV7PvsMG32k6yU2XDhEKyZw66eJaRdrXR7CzCcqUNC3zwgymPJRCH4KRRLINimpL14A5Y4GDeOqbsPRVcfuN7Xj44pav/hFfrNT2kr2rsqf2Ibp5pEA14ZIImUyW3t5REkkTXRGQ/DGGhtLginhqCWknQDE5hKf5UFSF9Lj020Q2ul5V1AR2hr+8vuP8Vlc2zMPRxoSjnx7XBC14sDoydahSGq7KdO/HFyrBchxCVfX4fDKp4T7SCQejYODZLrYgIqgKFsNIgQqEYob8mW6yiUyb7Z64LVK/+B85xznnJ3AWzqTzuIX46mr5wLs+UUTyIriBCjRNxguHMJIFDLEEvXEOVRWnSJ0+jCd4CJoGjoedM1CLcXQziW3nMV2TSMBeOx7vWZvPt1r+cMPzE8KunaUkFn0vNrvtqXj34c1W6gzxlEQ6naIoBahtnkMwoFMwIVzSRNguMt53Aj2s4nkSlgPoGqLkICsRNF0gl8rYWuP8+11/w/OOJDEhHPKLCIpOXmi+M9AgP+maiesLifF2T1Rn5ZNj5Lo/Qc/GcPMmhdoqlEgIGzCK4PiCmJKK68p4KfF3qYGuF0qCRUkJTzleUbvQyWRTuE5xYthxQbBs7EISAbkzUFG3VfXXbK2YFi3X/eryfKKnqVBItNjJxDzH8erddC4SqWwcN5WyTtlyO1RP/Lh3eHD76MB40swmiDVJyDLYRhpc5+ub6tse/wWKbvSQEAw1awAAAABJRU5ErkJggg=="title="备案号:津ICP备-2021000769号-2"></a><a style="margin-inline:5px"target="_blank"href="https://tongji.baidu.com/web/10000399748/overview/index?siteId=17522448"><img src="https://img.shields.io/badge/%E7%99%BE%E5%BA%A6-%E7%BB%9F%E8%AE%A1-blue?style=flat&logo=baidu"title="本站采用百度统计进行网站管理与维护"></a><a style="margin-inline:5px"target="_blank"href="http://creativecommons.org/licenses/by-nc-sa/4.0/"><img src="https://img.shields.io/badge/Copyright-BY--NC--SA%204.0-d42328?style=flat&logo=Claris"title="本站采用知识共享署名-非商业性使用-相同方式共享4.0国际许可协议进行许可"></a></p> copyright: false
3.10 评论系统valine(已停止使用)
开启评论
在主题配置文件的comments中填写需要用的评论
1 2 3 4 5 6 7 8 9 10 comments: use: Valine text: true lazyload: false count: true card_post_count: false
参数
解释
use
使用的评论(请注意,最多支持两个,如果不需要请留空)
text
是否显示评论服务商的名字
lazyload
是否为评论开启lazyload,开启后,只有滚动到评论位置时才会加载评论所需要的资源(开启lazyload后,评论数将不显示)
count
是否在文章顶部显示评论数(livere、Giscus 和utterances 不支持评论数显示)
card_post_count
是否在首页文章卡片显示评论数(gitalk、livere 、Giscus 和utterances 不支持评论数显示)
配置Valine
参考Valine文档 与Github项目
注册LeanCloud:国内版 注册使用需要域名备案,如果域名没有备案请使用国际版 。
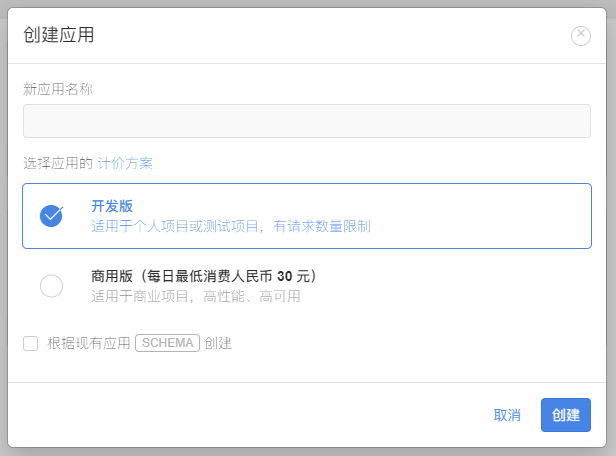
进入控制台,点击左下角创建应用
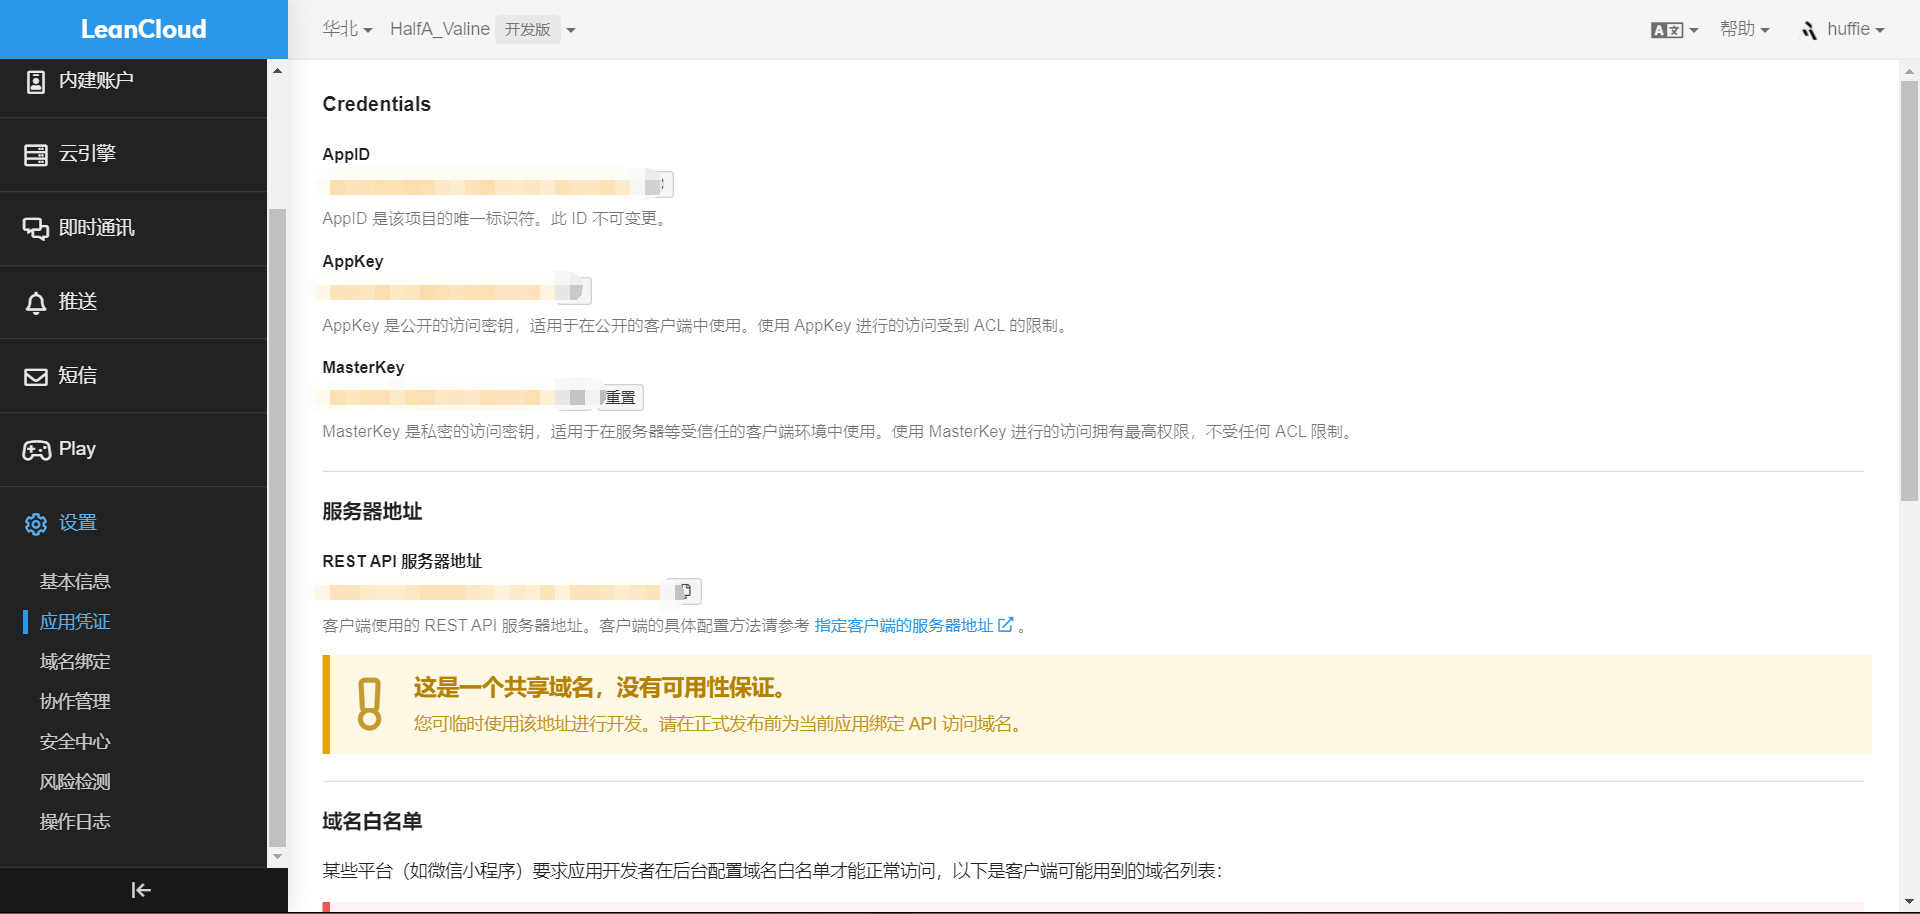
应用创建好后,进入应用界面,点击左下角的【设置-应用凭证】,可以看到APPID
将APPID和APPKey复制到主题配置文件的valine下
重新部署自己的网站,就可以看到评论系统了
在LeanCloud中:登录>选择你创建的应用>存储>选择Class Comment,然后就可以管理评论了
Valine高级配置
头像配置
参数值
表现形式
备注
空字符串''
Gravatar官方图形
mp神秘人(一个灰白头像)
identicon抽象几何图形
monsterid小怪物
wavatar用不同面孔和背景组合生成的头像
retro八位像素复古头像
robohash一种具有不同颜色、面部等的机器人
hide不显示头像
自定义表情
在Hexo根目录下的source/_data/下创建一个valine.json文件,文件内容为自定义表情,比如我们要用Bilibili的表情包(效果可以在评论区查看):
1 2 3 4 5 6 7 8 9 10 11 12 13 14 15 16 17 18 19 20 21 22 23 24 { "tv_doge" : "6ea59c827c414b4a2955fe79e0f6fd3dcd515e24.png" , "tv_亲亲" : "a8111ad55953ef5e3be3327ef94eb4a39d535d06.png" , "tv_偷笑" : "bb690d4107620f1c15cff29509db529a73aee261.png" , "tv_再见" : "180129b8ea851044ce71caf55cc8ce44bd4a4fc8.png" , "tv_冷漠" : "b9cbc755c2b3ee43be07ca13de84e5b699a3f101.png" , "tv_发怒" : "34ba3cd204d5b05fec70ce08fa9fa0dd612409ff.png" , "tv_发财" : "34db290afd2963723c6eb3c4560667db7253a21a.png" , "tv_可爱" : "9e55fd9b500ac4b96613539f1ce2f9499e314ed9.png" , "tv_吐血" : "09dd16a7aa59b77baa1155d47484409624470c77.png" , "tv_呆" : "fe1179ebaa191569b0d31cecafe7a2cd1c951c9d.png" , "tv_呕吐" : "9f996894a39e282ccf5e66856af49483f81870f3.png" , "tv_困" : "241ee304e44c0af029adceb294399391e4737ef2.png" , "tv_坏笑" : "1f0b87f731a671079842116e0991c91c2c88645a.png" , "tv_大佬" : "093c1e2c490161aca397afc45573c877cdead616.png" , "tv_大哭" : "23269aeb35f99daee28dda129676f6e9ea87934f.png" , "tv_委屈" : "d04dba7b5465779e9755d2ab6f0a897b9b33bb77.png" , "tv_害羞" : "a37683fb5642fa3ddfc7f4e5525fd13e42a2bdb1.png" , "tv_尴尬" : "7cfa62dafc59798a3d3fb262d421eeeff166cfa4.png" , "tv_微笑" : "70dc5c7b56f93eb61bddba11e28fb1d18fddcd4c.png" , "tv_思考" : "90cf159733e558137ed20aa04d09964436f618a1.png" , "tv_惊吓" : "0d15c7e2ee58e935adc6a7193ee042388adc22af.png" }
主页显示最近评论
1 2 3 4 5 6 7 newest_comments : enable: true sort_order : limit: 6 storage: 10 avatar: true
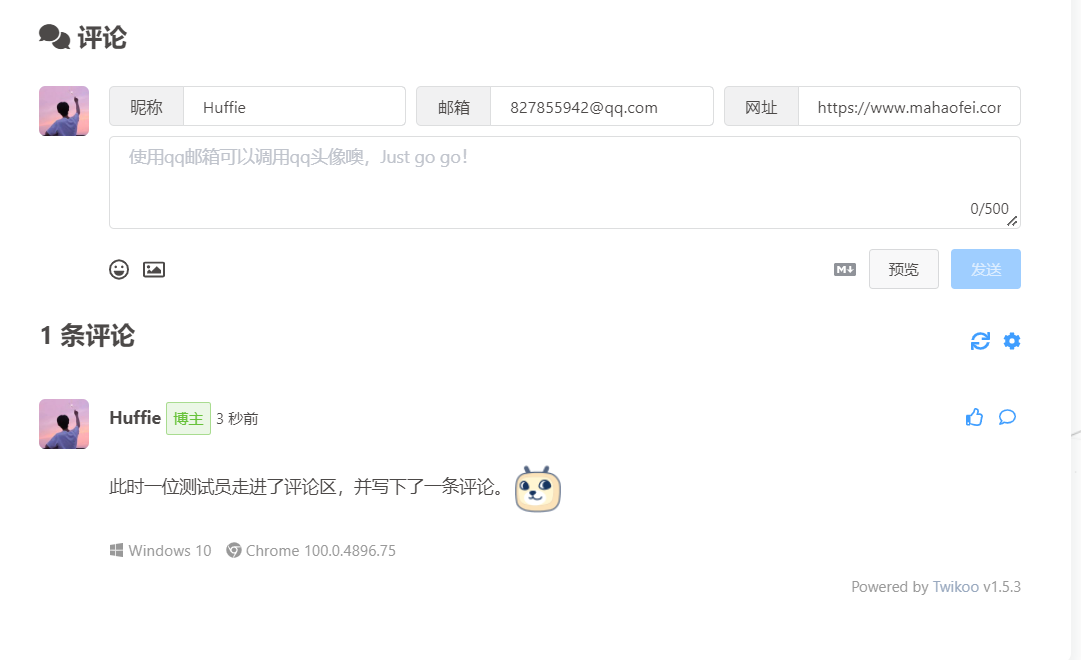
3.11 评论系统twikoo
原本的腾讯云部署已经不适用了,切换为Vercel+MongoDB,具体方法参考官方文档
(2)添加自定义表情
在小康的表情速查 查找想要的表情,找到其中的twikoo的json代码复制下来,在本地新建一个json文件,将json代码复制进去。
然后将该json文件上传至服务器,或者保存例如butterfly/source/json/qq.json,这样就可以通过www.mahaofei.com/json/qq.json访问到该文件了。
到twikoo的控制面板【插件-SHOW_EMOTION】设置为true,【插件-EMOTION_CDN】填写自己的json文件链接,如果有多个文件使用英文逗号,分开,保存。
刷新网页,即可完成。
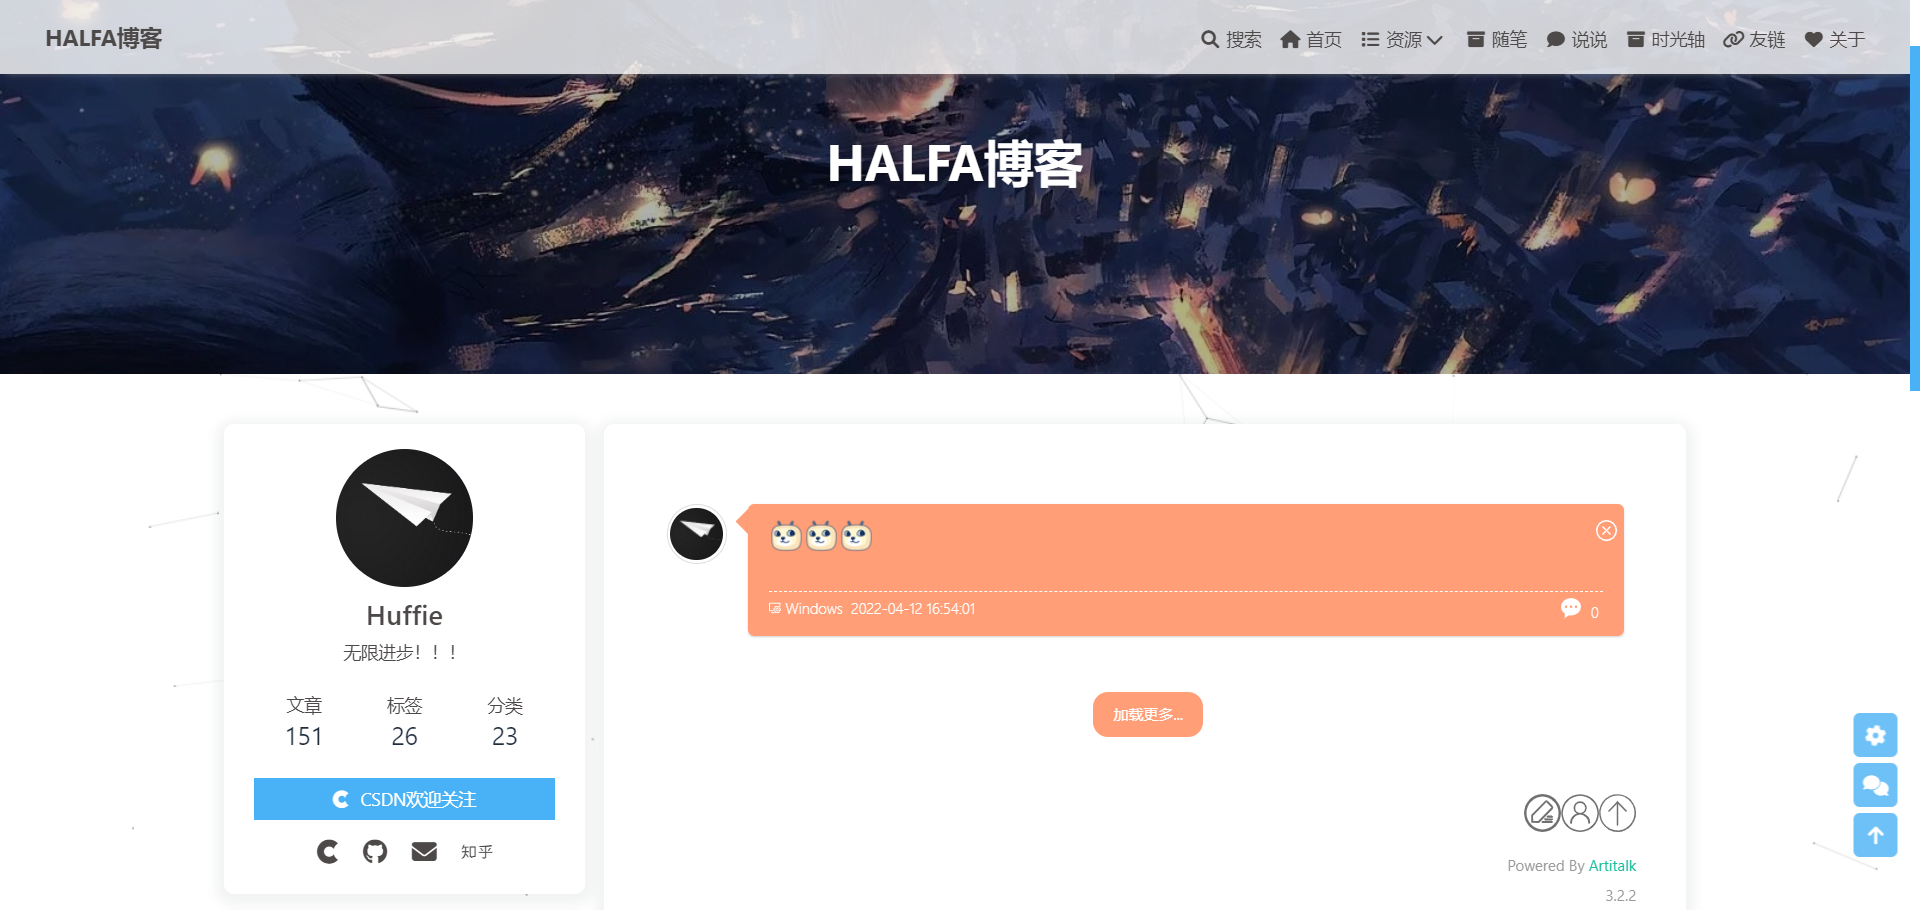
3.12 Artitalk说说
前往 LeanCloud 国际版 ,注册账号。
注册完成之后根据 LeanCloud 的提示绑定手机号和邮箱。
绑定完成之后点击创建应用,应用名称随意,接着在结构化数据中创建 class,命名为 shuoshuo。
在你新建的应用中找到结构化数据下的用户。点击添加用户,输入想用的用户名及密码。
回到结构化数据中,点击 class 下的 shuoshuo。找到权限,在 Class 访问权限中将 add_fields 以及 create 权限设置为指定用户,输入你刚才输入的用户名会自动匹配。为了安全起见,将 delete 和 update 也设置为跟它们一样的权限。
然后新建一个名为atComment的class,权限什么的使用默认的即可。
点击 class 下的 _User 添加列,列名称为 img,默认值填上你这个账号想要用的发布说说的头像url,这一项不进行配置,说说头像会显示为默认头像 —— Artitalk 的 logo。
在最菜单栏中找到设置-> 应用 keys,记下来 AppID 和 AppKey ,一会会用。
最后将 _User 中的权限全部调为指定用户,或者数据创建者,为了保证不被篡改用户数据以达到强制发布说说。
安装hexo-butterfly-artitalk插件
1 npm install hexo-butterfly-artitalk
在主题配置文件中添加如下配置
1 2 3 4 5 6 7 8 9 10 artitalk: enable: true appId: appKey: path: js: option: front_matter:
默认的访问网址:/artitalk/index.html
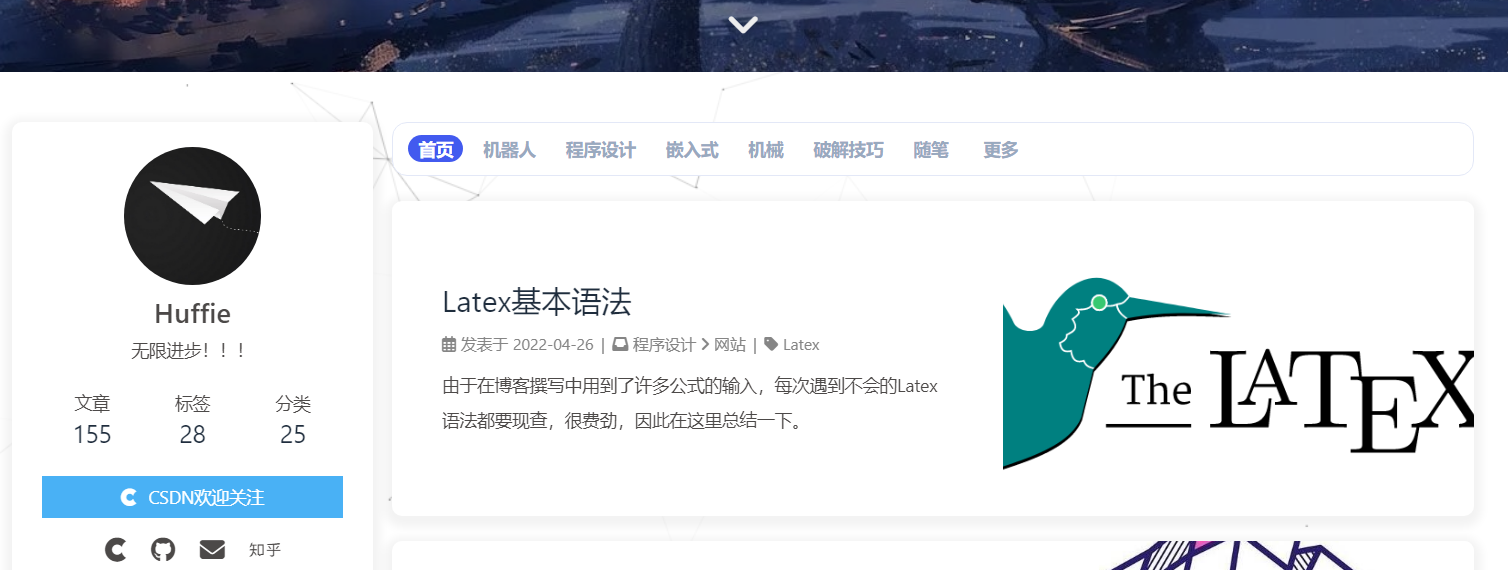
3.13 动态分类条
参考【张洪老师的博客】 ,分类的添加使用纯手工的方式。
新建文件
新建一个文件:themes/butterfly/layout/includes/categoryBar.pug
1 2 3 4 5 6 7 8 9 10 11 12 13 14 15 #category-bar .category-bar-items#category-bar-items .category-bar-item(id='首页') a(href="/") 首页 .category-bar-item(id='程序设计') a(href="/categories/程序设计/") 程序设计 .category-bar-item(id='机器人') a(href="/categories/机器人/") 机器人 .category-bar-item(id='嵌入式') a(href="/categories/嵌入式/") 嵌入式 .category-bar-item(id='经验分享') a(href="/categories/经验分享/") 经验分享 .category-bar-item(id='随笔') a(href="/categories/随笔/") 随笔 a.category-bar-more(href="/categories/") 更多
引用文件
编辑themes/butterfly/layout/index.pug
在+postUI上一行添加include includes/categoryBar.pug,并保持缩进相同。
1 2 3 4 5 6 7 8 extends includes/layout.pug block content include ./includes/mixins/post-ui.pug #recent-posts.recent-posts include includes/categoryBar.pug +postUI include includes/pagination.pug
编辑themes/butterfly/layout/category.pug,在#category下方添加以下代码
1 2 3 4 5 #category .category-in-bar .category-in-bar-tips | 分类 include includes/categoryBar.pug
引用CSS和JS
链接: https://pan.baidu.com/s/13iOkTwWDbtzlFzRLTdQl9Q?pwd=9e32
将其中的MainColor.css, categoryBar.css两个文件复制到themes/butterfly/source/css目录下,将categoryBar.js复制到themes/butterfly/source/js目录下,然后在主题配置文件_config.yml中引用这三个文件。
1 2 3 4 5 6 inject: head: - <link rel="stylesheet" href="/css/categoryBar.css"> - <link rel="stylesheet" href="/css/MainColor.css"> bottom: - <script src="/js/categoryBar.js"></script>
3.14 Butterfly首页隐藏文章
打开文件:themes/butterfly/layout/includes/mixins/post-ui.pug
注意,主要是添加了if article.hide !== true这一行,然后这一行后全部需要按下tab缩进一层。
1 2 3 4 mixin postUI(posts) each article , index in page.posts.data if article.hide !== true .recent-post-item
在md文件的头部信息中添加hide: true
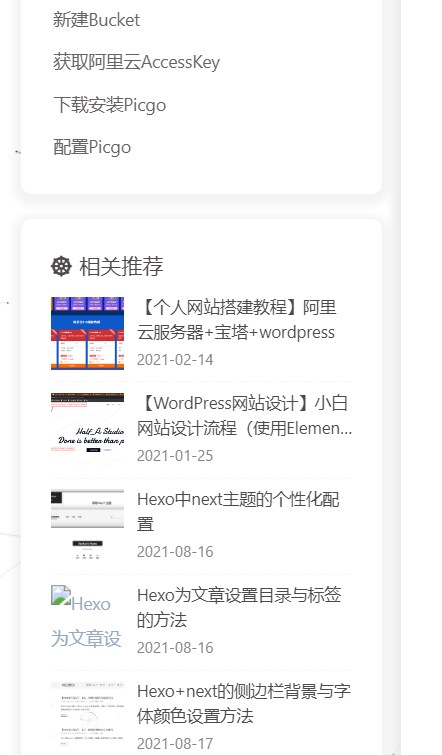
3.15 相关推荐侧边栏化
参考文章:《Butterfly 布局调整 ——— 相关推荐版块侧栏卡片化》
修改 [Blogroot]\themes\butterfly\scripts\helpers\related_post.js, 从大概 47 行开始到 70 行的部分。
1 2 3 4 5 6 7 8 9 10 11 12 13 14 15 16 17 18 19 20 21 22 23 if (relatedPosts.length > 0 ) { result += '<div class="card-widget card-recommend-post">' result += `<div class="item-headline"><i class="fas fa-dharmachakra"></i><span>${headlineLang} </span></div>` result += '<div class="aside-list">' for (let i = 0 ; i < Math .min (relatedPosts.length , limitNum); i++) { const cover = relatedPosts[i].cover === false ? relatedPosts[i].randomcover : relatedPosts[i].cover result += `<div class="aside-list-item">` result += `<a class="thumbnail" href="${this .url_for(relatedPosts[i].path)} " title="${relatedPosts[i].title} "><img src="${this .url_for(cover)} " alt="${relatedPosts[i].title} "></a>` result += `<div class="content">` result += `<a class="title" href="${this .url_for(relatedPosts[i].path)} " title="${relatedPosts[i].title} ">${relatedPosts[i].title} </a>` if (dateType === 'created' ) { result += `<time datetime="${this .date(relatedPosts[i].created, hexoConfig.date_format)} " title="发表于 ${this .date(relatedPosts[i].created, hexoConfig.date_format)} ">${this .date(relatedPosts[i].created, hexoConfig.date_format)} </time>` } else { result += `<time datetime="${this .date(relatedPosts[i].updated, hexoConfig.date_format)} " title="发表于 ${this .date(relatedPosts[i].updated, hexoConfig.date_format)} ">${this .date(relatedPosts[i].updated, hexoConfig.date_format)} </time>` } result += `</div></div>` } result += '</div></div>' return result }
因为原本的版块是在文章下方,而现在我们需要把它改到侧栏。所以需要修改 [Blogroot]\themes\butterfly\layout\post.pug 大约 26 行的位置先移除在文章底部的推荐版块。
1 2 3 4 5 6 if theme.post_pagination include includes/pagination.pug - if theme.related_post && theme.related_post.enable - != related_posts(page,site.posts) if page.comments !== false && theme.comments && theme.comments.use
然后修改 [Blogroot]\themes\butterfly\layout\includes\widget\index.pug, 这个文件每个版本都长得不太一样,这里仅供参考。因为感觉文章也最新文章和推荐文章同时存在,最新文章就显得有点多余了,所以我把最新文章的侧栏卡片注释了。
1 2 3 4 5 6 7 8 9 10 11 12 13 14 15 16 17 18 #aside-content.aside-content //- post if is_post() if showToc && theme.toc.style_simple .sticky_layout include ./card_post_toc.pug else !=partial('includes/custom/SAO_card_player', {}, {cache:theme.fragment_cache}) !=partial('includes/widget/card_announcement', {}, {cache:theme.fragment_cache}) !=partial('includes/widget/card_top_self', {}, {cache:theme.fragment_cache}) .sticky_layout if showToc include ./card_post_toc.pug + if theme.related_post && theme.related_post.enable + != related_posts(page,site.posts) - - !=partial('includes/widget/card_recent_post', {}, {cache:theme.fragment_cache}) + //- !=partial('includes/widget/card_recent_post', {}, {cache:theme.fragment_cache}) !=partial('includes/widget/card_ad', {}, {cache:theme.fragment_cache})
改动完成后运行 hexo clean,hexo generate,hexo server 三件套就能看到完成效果了。
3.16 侧边栏添加历史上的今天
在[Blogroot]\themes\butterfly\layout\includes\widget\ 中新建一个card_history.pug文件,内容如下。
1 2 3 4 5 6 7 8 .card-widget.card-history .card-content .item-headline i.fas.fa-clock.fa-spin span= _p('那年今日') #history-baidu(style='height: 60px;overflow: hidden;') #history-container.history_swiper-container(style="width: 100%;height: 100%;") #history_container_wrapper.swiper-wrapper(style="height:20px" )
修改位于 [Blogroot]\themes\butterfly\layout\includes\widget\ 中的index.pug。
1 2 3 4 5 6 7 8 9 10 11 12 13 14 15 16 17 18 19 20 21 22 23 24 25 26 27 28 29 30 31 32 33 34 35 36 37 #aside-content.aside-content //- post if is_post() - const tocStyle = page.toc_style_simple - const tocStyleVal = tocStyle if showToc && tocStyleVal .sticky_layout include ./card_post_toc.pug else !=partial('includes/widget/card_author', {}, {cache: true}) !=partial('includes/widget/card_announcement', {}, {cache: true}) !=partial('includes/widget/card_top_self', {}, {cache: true}) .sticky_layout if showToc include ./card_post_toc.pug if theme.related_post && theme.related_post.enable + !=partial('includes/widget/card_history', {}, {cache: true}) !=partial('includes/widget/card_recent_post', {}, {cache:theme.fragment_cache}) !=partial('includes/widget/card_ad', {}, {cache: true}) else //- page !=partial('includes/widget/card_author', {}, {cache: true}) !=partial('includes/widget/card_announcement', {}, {cache: true}) !=partial('includes/widget/card_top_self', {}, {cache: true}) .sticky_layout if showToc include ./card_post_toc.pug + !=partial('includes/widget/card_history', {}, {cache: true}) !=partial('includes/widget/card_recent_post', {}, {cache: true}) !=partial('includes/widget/card_ad', {}, {cache: true}) !=partial('includes/widget/card_newest_comment', {}, {cache: true}) !=partial('includes/widget/card_categories', {}, {cache: true}) !=partial('includes/widget/card_tags', {}, {cache: true}) !=partial('includes/widget/card_archives', {}, {cache: true}) !=partial('includes/widget/card_webinfo', {}, {cache: true}) !=partial('includes/widget/card_bottom_self', {}, {cache: true})
打开 主题配置文件_config.yml 搜索到 aside: 处,添加开关:
1 2 3 4 5 6 7 8 aside: enable: true mobile: true position: left card_history: enable: true card_author: enable: true
然后搜索inject:,进行如下修改
1 2 3 4 5 6 7 8 inject: head: - <link rel="stylesheet" href="https://unpkg.com/swiper/swiper-bundle.min.css"> - <link rel="stylesheet" href="https://cdn.jsdelivr.net/gh/Zfour/Butterfly-card-history/baiduhistory/css/main.css"> bottom: - <script src="https://unpkg.com/swiper/swiper-bundle.min.js"></script> - <script src="https://cdn.jsdelivr.net/gh/Zfour/Butterfly-card-history/baiduhistory/js/main.js"></script>
3.17 白天/黑夜模式切换动画
参考《Akilarの糖果屋-添加白天夜间模式转换动画》
新建 [Blogroot]\themes\butterfly\layout\includes\custom\light_dark.pug, 这部分其实实质上就是一个 svg 文件,通过 js 操作它的旋转显隐,淡入淡出实现动画效果。
1 2 3 4 5 6 7 8 9 svg(aria-hidden='true', style='position:absolute; overflow:hidden; width:0; height:0') symbol#icon-sun(viewBox='0 0 1024 1024') path(d='M960 512l-128 128v192h-192l-128 128-128-128H192v-192l-128-128 128-128V192h192l128-128 128 128h192v192z', fill='#FFD878', p-id='8420') path(d='M736 512a224 224 0 1 0-448 0 224 224 0 1 0 448 0z', fill='#FFE4A9', p-id='8421') path(d='M512 109.248L626.752 224H800v173.248L914.752 512 800 626.752V800h-173.248L512 914.752 397.248 800H224v-173.248L109.248 512 224 397.248V224h173.248L512 109.248M512 64l-128 128H192v192l-128 128 128 128v192h192l128 128 128-128h192v-192l128-128-128-128V192h-192l-128-128z', fill='#4D5152', p-id='8422') path(d='M512 320c105.888 0 192 86.112 192 192s-86.112 192-192 192-192-86.112-192-192 86.112-192 192-192m0-32a224 224 0 1 0 0 448 224 224 0 0 0 0-448z', fill='#4D5152', p-id='8423') symbol#icon-moon(viewBox='0 0 1024 1024') path(d='M611.370667 167.082667a445.013333 445.013333 0 0 1-38.4 161.834666 477.824 477.824 0 0 1-244.736 244.394667 445.141333 445.141333 0 0 1-161.109334 38.058667 85.077333 85.077333 0 0 0-65.066666 135.722666A462.08 462.08 0 1 0 747.093333 102.058667a85.077333 85.077333 0 0 0-135.722666 65.024z', fill='#FFB531', p-id='11345') path(d='M329.728 274.133333l35.157333-35.157333a21.333333 21.333333 0 1 0-30.165333-30.165333l-35.157333 35.157333-35.114667-35.157333a21.333333 21.333333 0 0 0-30.165333 30.165333l35.114666 35.157333-35.114666 35.157334a21.333333 21.333333 0 1 0 30.165333 30.165333l35.114667-35.157333 35.157333 35.157333a21.333333 21.333333 0 1 0 30.165333-30.165333z', fill='#030835', p-id='11346')
新建 [Blogroot]\themes\butterfly\source\css\_layout\light_dark.styl
1 2 3 4 5 6 7 8 9 10 11 12 13 14 15 16 17 18 19 20 21 22 23 24 25 26 27 28 29 30 31 32 33 34 35 36 37 38 39 40 41 42 43 44 45 46 47 48 49 50 51 52 53 54 55 56 57 58 59 60 61 62 63 64 65 66 67 68 .Cuteen_DarkSky , .Cuteen_DarkSky :before content '' position fixed left 0 right 0 top 0 bottom 0 z-index 88888888 .Cuteen_DarkSky background linear-gradient(#feb8b0 , #fef9db ) &:before transition 2s ease all opacity 0 background linear-gradient(#4c3f6d , #6c62bb , #93b1ed ) .DarkMode .Cuteen_DarkSky &:before opacity 1 .Cuteen_DarkPlanet z-index 99999999 position fixed left -50% top -50% width 200% height 200% -webkit-animation CuteenPlanetMove 2s cubic-bezier(0.7 , 0 , 0 , 1 ) animation CuteenPlanetMove 2s cubic-bezier(0.7 , 0 , 0 , 1 ) transform-origin center bottom @-webkit-keyframes CuteenPlanetMove { 0% { transform : rotate(0 ); } to { transform : rotate(360deg ); } } @keyframes CuteenPlanetMove { 0% { transform : rotate(0 ); } to { transform : rotate(360deg ); } } .Cuteen_DarkPlanet &:after position absolute left 35% top 40% width 9.375rem height 9.375rem border-radius 50% content '' background linear-gradient(#fefefe , #fffbe8 ) .search span display none .menus_item a text-decoration none!important
新建 [Blogroot]\themes\butterfly\source\js\sun_moon.js
1 2 3 4 5 6 7 8 9 10 11 12 13 14 15 16 17 18 19 20 21 22 23 24 25 26 27 28 function switchNightMode ( document .querySelector ('body' ).insertAdjacentHTML ('beforeend' , '<div class="Cuteen_DarkSky"><div class="Cuteen_DarkPlanet"></div></div>' ), setTimeout (function ( document .querySelector ('body' ).classList .contains ('DarkMode' ) ? (document .querySelector ('body' ).classList .remove ('DarkMode' ), localStorage .setItem ('isDark' , '0' ), document .getElementById ('modeicon' ).setAttribute ('xlink:href' , '#icon-moon' )) : (document .querySelector ('body' ).classList .add ('DarkMode' ), localStorage .setItem ('isDark' , '1' ), document .getElementById ('modeicon' ).setAttribute ('xlink:href' , '#icon-sun' )), setTimeout (function ( document .getElementsByClassName ('Cuteen_DarkSky' )[0 ].style .transition = 'opacity 3s' ; document .getElementsByClassName ('Cuteen_DarkSky' )[0 ].style .opacity = '0' ; setTimeout (function ( document .getElementsByClassName ('Cuteen_DarkSky' )[0 ].remove (); }, 1e3 ); }, 2e3 ) }) const nowMode = document .documentElement .getAttribute ('data-theme' ) === 'dark' ? 'dark' : 'light' if (nowMode === 'light' ) { activateDarkMode () saveToLocal.set ('theme' , 'dark' , 2 ) GLOBAL_CONFIG .Snackbar !== undefined && btf.snackbarShow (GLOBAL_CONFIG .Snackbar .day_to_night ) document .getElementById ('modeicon' ).setAttribute ('xlink:href' , '#icon-sun' ) } else { activateLightMode () saveToLocal.set ('theme' , 'light' , 2 ) document .querySelector ('body' ).classList .add ('DarkMode' ), document .getElementById ('modeicon' ).setAttribute ('xlink:href' , '#icon-moon' ) } typeof utterancesTheme === 'function' && utterancesTheme () typeof FB === 'object' && window .loadFBComment () window .DISQUS && document .getElementById ('disqus_thread' ).children .length && setTimeout (() => window .disqusReset (), 200 ) }
修改 [Blogroot]\themes\butterfly\layout\includes\rightside.pug, 把原本的昼夜切换按钮替换掉
1 2 3 4 5 6 7 8 9 10 when 'translate' if translate.enable button#translateLink(type="button" title=_p('rightside.translate_title'))= translate.default when 'darkmode' if darkmode.enable && darkmode.button - button#darkmode(type="button" title=_p('rightside.night_mode_title')) - i.fas.fa-adjust + a.hidden(onclick='switchNightMode()', title=_p('rightside.night_mode_title')) + i.fas.fa-adjust + use#modeicon(xlink:href='#icon-moon')
修改 [Blogroot]\_config.butterfly.yml, 引入一下 js
1 2 3 4 inject: head: bottome: - <script src="/js/sun_moon.js" async></script>
3.18 twikoo评论气泡风格
参考《Akilarの糖果屋-twikoo 评论块气泡风格魔改美化》
新建 [Blogroot]\themes\butterfly\source\css\custom\twikoo_beautify.css
1 2 3 4 5 6 7 8 9 10 11 12 13 14 15 16 17 18 19 20 21 22 23 24 25 26 27 28 29 30 31 32 33 34 35 36 37 38 39 40 41 42 43 44 45 46 47 48 49 50 51 52 53 54 55 56 57 58 59 60 61 62 63 64 65 66 67 68 69 70 71 72 73 74 75 76 77 78 79 80 81 82 83 84 85 86 87 88 89 90 91 92 93 94 95 96 97 98 99 100 101 102 103 104 105 106 107 108 109 110 111 112 113 114 115 116 117 118 119 120 121 122 123 124 125 126 127 128 129 130 131 132 133 134 135 136 137 138 139 140 141 142 143 144 145 146 147 148 149 150 151 152 153 154 155 156 157 158 159 160 161 162 163 164 165 166 167 168 169 170 171 172 173 174 175 176 177 178 179 180 181 182 183 184 185 186 187 188 189 190 191 192 193 194 195 196 197 198 199 200 201 202 203 204 205 206 207 208 209 210 211 212 213 214 215 216 217 218 219 220 221 222 223 224 225 226 227 228 229 230 231 232 233 234 235 236 237 238 239 240 241 242 243 244 245 246 247 248 249 250 251 252 253 254 255 256 257 258 259 260 261 262 263 264 265 .OwO .OwO-body .OwO-items-image .OwO-item { max-width : calc (25% - 10px ) !important ; } .tk-content img .tk-owo-emotion { vertical-align : bottom; } .tk-input [data-v-619b4c52] .el-textarea__inner { height : 130px !important ; } .tk-input [data-v-619b4c52] .el-textarea__inner :focus { background-image : none !important ; } .tk-replies { left : -70px ; width : calc (100% + 70px ); } .tk-avatar { width : 3rem !important ; height : 3rem !important ; } .tk-avatar img { width : 3rem !important ; height : 3rem !important ; } .tk-comments-container .tk-submit { position : relative; left : -70px ; width : 110% ; } .tk-content { background : #00a6ff ; padding : 10px ; left : 8px ; color : white; border-radius : 10px ; font-size : 16px !important ; width : fit-content; max-width : 100% ; position : relative !important ; overflow : visible !important ; max-height : none !important ; } .tk-content img { max-width : 100% !important ; } .tk-content pre { white-space : pre-wrap; word-wrap : break-word; } .tk-content a { color : #eeecaa ; } .tk-content ::before { content : '' ; width : 0 ; height : 0 ; position : absolute; top : 20px ; left : -13px ; border-top : 2px solid transparent; border-bottom : 20px solid transparent; border-right : 15px solid #00a6ff ; border-left : 0 solid transparent; } .tk-master .tk-content { background : #ff8080 ; color : white; width : fit-content; max-width : 100% ; left : 9px ; } .tk-master .tk-content a { color : #eeecaa ; } .tk-master .tk-content ::before { content : '' ; width : 0 ; height : 0 ; position : absolute; top : 20px ; left : -13px ; border-top : 2px solid transparent; border-bottom : 20px solid transparent; border-right : 15px solid #ff8080 ; border-left : 0 solid transparent; } .tk-row [data-v-d82ce9a0] { max-width : 100% ; width : fit-content; margin-left : 10px ; } .tk-avatar { border-radius : 50% ; margin-top : 15px ; } .tk-master .tk-avatar { position : relative; left : 6px ; } [data-theme="dark" ] .tk-content { background : #1d1d1f ; color : white; } [data-theme="dark" ] .tk-content a { color : #dfa036 ; } [data-theme="dark" ] .tk-content ::before { border-right : 15px solid #1d1d1f ; } [data-theme="dark" ] .tk-master .tk-content { background : #1c1c1e ; color : white; } [data-theme="dark" ] .tk-master .tk-content a { color : #dfa036 ; } [data-theme="dark" ] .tk-master .tk-content ::before { border-top : 2px solid transparent; border-bottom : 20px solid transparent; border-right : 15px solid #1c1c1e ; border-left : 0 solid transparent; } @media screen and (min-width : 1024px ) { .tk-content { max-width : 75% ; width : fit-content; } .tk-master .tk-content { width : 75% ; left : 80px ; } .tk-master .tk-content ::before { left : 100% ; border-left : 15px solid #ff8080 ; border-right : 0 solid transparent; } .tk-master .tk-avatar { position : relative; left : calc (75% + 120px ); } .tk-master .tk-row [data-v-d82ce9a0] { position : relative; top : 0 ; left : calc (55% ); } [data-theme="dark" ] .tk-master .tk-content ::before { border-left : 15px solid #1c1c1e ; border-right : 0 solid transparent; } } .tk-extras { opacity : 0 ; -ms-filter : "progid:DXImageTransform.Microsoft.Alpha(Opacity=0)" ; filter : alpha (opacity=0 ); } .tk-content :hover + .tk-extras { -webkit-animation : tk-extras-fadeIn 0.5s linear; -moz-animation : tk-extras-fadeIn 0.5s linear; -o-animation : tk-extras-fadeIn 0.5s linear; -ms-animation : tk-extras-fadeIn 0.5s linear; animation : tk-extras-fadeIn 0.5s linear; -webkit-animation-fill-mode : forwards; -moz-animation-fill-mode : forwards; -o-animation-fill-mode : forwards; -ms-animation-fill-mode : forwards; animation-fill-mode : forwards; } @-moz-keyframes tk-extras-fadeIn { from { opacity : 0 ; -ms-filter : "progid:DXImageTransform.Microsoft.Alpha(Opacity=0)" ; filter : alpha (opacity=0 ); } to { opacity : 1 ; -ms-filter : none; filter : none; } } @-webkit-keyframes tk-extras-fadeIn { from { opacity : 0 ; -ms-filter : "progid:DXImageTransform.Microsoft.Alpha(Opacity=0)" ; filter : alpha (opacity=0 ); } to { opacity : 1 ; -ms-filter : none; filter : none; } } @-o-keyframes tk-extras-fadeIn { from { opacity : 0 ; -ms-filter : "progid:DXImageTransform.Microsoft.Alpha(Opacity=0)" ; filter : alpha (opacity=0 ); } to { opacity : 1 ; -ms-filter : none; filter : none; } } @keyframes tk-extras-fadeIn { from { opacity : 0 ; -ms-filter : "progid:DXImageTransform.Microsoft.Alpha(Opacity=0)" ; filter : alpha (opacity=0 ); } to { opacity : 1 ; -ms-filter : none; filter : none; } }
修改 [Blogroot]\_config.butterfly.yml 的 inject 配置项
1 2 3 inject: head: + - <link rel="stylesheet" href="/css/custom/twikoo_beautify.css" media="defer" onload="this.media='all'">
3.19 留言板
参考《Akilarの糖果屋-信笺样式留言板》
安装插件
1 npm install hexo-butterfly-envelope --save
在站点配置文件或者主题配置文件添加配置项(对,两者任一均可。但不要都写)
1 2 3 4 5 6 7 8 9 10 11 12 13 14 15 16 envelope_comment: enable: true cover: https://ae01.alicdn.com/kf/U5bb04af32be544c4b41206d9a42fcacfd.jpg message: - 有什么想问的? - 有什么想说的? - 有什么想吐槽的? - 哪怕是有什么想吃的,都可以告诉我哦~ bottom: 自动书记人偶竭诚为您服务! height: path: front_matter: title: 留言板 comments: true
修改留言页:打开[Blogroot]\node_modules\hexo-butterfly-envelope\lib\html.pug,在文件末尾添加自己想要的内容。
HTML转PUG在线工具:http://www.html2jade.org/
3.20 GitCalendar提交日历
项目地址:https://github.com/Zfour/hexo-github-calendar
(1)安装插件
1 npm i hexo-githubcalendar --save
(2)新增网站根目录_config 配置项 (不是主题的)
1 2 3 4 5 6 7 8 9 10 11 12 13 14 15 16 17 18 19 20 21 22 23 24 25 26 27 28 29 30 31 32 33 34 35 36 37 38 gitcalendar: enable: true priority: 5 enable_page: / layout: type: id name: recent-posts index: 0 user: HuffieMa apiurl: 'https://githubapi.ryanchristian.dev/user/' minheight: pc: 280px mibile: 0px color: "['#ebedf0', '#f1f8ff', '#dbedff', '#c8e1ff', '#79b8ff', '#2188ff', '#0366d6', '#005cc5', '#044289', '#032f62', '#05264c']" container: .recent-post-item(style='width:100%;height:auto;padding:10px;') gitcalendar_css: https://cdn.cbd.int/hexo-filter-gitcalendar/lib/gitcalendar.css gitcalendar_js: https://cdn.cbd.int/hexo-filter-gitcalendar/lib/gitcalendar.js
更多配置项含义请到https://zfe.space/post/hexo-githubcalendar.html 查看。
重新hexo clean,hexo g, hexo s即可看到效果
ps.官方api被墙了,可以参考https://github.com/zkeq/python_github_calendar_api 在Vercel部署自己的API,然后绑定自己的域名
3.21 版权声明页美化
编辑butterfly/layout/includes/post/post-copyright.pug
1 2 3 4 5 6 7 8 9 10 11 12 13 14 15 16 17 18 19 20 21 22 23 24 25 26 27 28 29 30 31 32 33 if theme.post_copyright.enable && page.copyright !== false - let author = page.copyright_author ? page.copyright_author : config.author - let url = page.copyright_url ? page.copyright_url : page.permalink - let license = page.license ? page.license : theme.post_copyright.license - let license_url = page.license_url ? page.license_url : theme.post_copyright.license_url .post-copyright .post-copyright__title span.post-copyright-info h #[=page.title] .post-copyright__type span.post-copyright-info a(href=url_for(url))= theme.post_copyright.decode ? decodeURI(url) : url .post-copyright-m .post-copyright-m-info .post-copyright-a h 作者 .post-copyright-cc-info h=author .post-copyright-c h 发布于 .post-copyright-cc-info h=date(page.date, config.date_format) .post-copyright-u h 更新于 .post-copyright-cc-info h=date(page.updated, config.date_format) .post-copyright-c h 许可协议 .post-copyright-cc-info a.icon(rel='noopener' target='_blank' title='Creative Commons' href='https://creativecommons.org/') i.fab.fa-creative-commons a(rel='noopener' target='_blank' title=license href=url_for(license_url))=license
编辑butterfly/source/css/_layout/post.styl
1 2 3 4 5 6 7 8 9 10 11 12 13 14 15 16 17 18 19 20 21 22 23 24 25 26 27 28 29 30 31 32 33 34 35 36 37 38 39 40 41 42 43 44 45 46 47 48 49 50 51 52 53 54 55 56 57 58 59 60 61 62 63 64 65 66 67 68 69 70 71 72 73 74 75 76 77 78 79 80 81 82 83 84 85 86 87 88 89 90 91 92 93 94 95 96 97 98 99 100 101 102 103 104 105 106 107 108 109 110 111 112 113 114 115 116 117 118 119 120 121 122 123 124 125 126 127 128 129 130 131 132 133 134 135 136 137 138 139 140 141 142 143 144 145 146 147 148 149 150 151 152 153 154 155 156 157 158 159 160 161 162 163 164 165 166 167 168 169 170 171 172 173 174 175 176 177 178 179 180 181 182 183 184 185 186 187 188 189 190 191 192 193 194 195 196 197 198 199 200 201 202 203 204 205 206 207 208 209 210 211 212 213 214 215 216 217 218 219 220 221 222 223 224 225 226 227 228 229 230 231 232 233 234 235 236 237 238 239 240 241 242 243 244 245 246 247 248 249 250 251 252 253 254 255 256 257 258 259 260 261 262 263 264 265 266 267 268 269 270 271 272 273 274 275 276 277 278 279 280 281 282 283 284 285 286 287 288 289 290 291 292 293 294 295 296 297 298 299 300 301 302 303 304 305 beautify() headStyle(fontsize) padding-left : unit (fontsize + .4 , 'rem' ) code font-size: unit (fontsize, 'rem' ) &:before margin-left: unit ((- (fontsize + .2 )), 'rem' ) font-size: unit (fontsize, 'rem' ) &:hover padding-left: unit (fontsize + .6 , 'rem' ) h1, h2, h3, h4, h5, h6 transition: all .2s ease-out &:before position: absolute top: calc (50% - .35rem ) color: $title-prefix-icon-color content: $title-prefix-icon line-height: 1 transition: all .2s ease-out @extend .fontawesomeIcon &:hover &:before color: $light-blue h1 headStyle (1 ) h2 headStyle (.9 ) h3 headStyle (.8 ) h4 headStyle (.7 ) h5 headStyle (.6 ) h6 headStyle (.6 ) ol, ul margin-top: .4rem padding: 0 0 0 .8rem list-style: none counter-reset: li +maxWidth768 () padding: 0 0 0 .4rem p margin: 0 0 .5rem ol, ul padding-left: .6rem +maxWidth768 () padding-left: .2rem li &:not (.tab) position: relative margin: .2rem 0 &:hover &:before transform: rotate (360deg ) &:before position: absolute top: 0 left: 0 background: $light-blue color: $white cursor: pointer transition: all .3s ease-out ol > li &:not (.tab) padding: .2em .2em .2em 1.8em &:before margin-top: .65em width: w = 1.45em height: h = w border-radius: .5 * w content: counter (li) counter-increment: li text-align: center font-size: .85em line-height: h ul > li:not (.tab) padding: .2em .2em .2em 1.4em &:hover &:before border-color: $pseudo-hover &:before $w = .42em top: .78em width: w = $w height: h = w border: .5 * w solid $light-blue border-radius: w background: transparent content: '' line-height: h no-beautify () ol, ul margin-top: .4rem p margin: 0 0 .5rem ol, ul padding-left: .5rem li position: relative margin: .3rem 0 padding-left: .3rem #article-container word-wrap: break-word overflow-wrap: break-word a color: $theme-link-color &:hover text-decoration: underline img display: block margin: 0 auto .8rem p margin: 0 0 .8rem iframe margin: 0 0 1rem if hexo-config ('beautify.enable' ) && hexo-config ('beautify.field' ) == 'site' beautify () else if hexo-config ('beautify.enable' ) && hexo-config ('beautify.field' ) == 'post' no-beautify () &.post-content beautify () else no-beautify () #post .tag_share .post-meta &__tag-list display: inline-block &__tags display: inline-block margin: .4rem .4rem .4rem 0 padding: 0 .6rem width: fit-content border: 1px solid $light-blue border-radius: .6rem color: $light-blue font-size: .85em transition: all .2s ease-in-out &:hover background: $light-blue color: var (--white) .post_share display: inline-block float: right margin: .4rem 0 width: fit-content .social-share font-size: .85em .social-share-icon margin: 0 4px width: w = 1.85em height: w font-size: 1.2em line-height: w .post-copyright position: relative margin: 2rem 0 .5rem padding: .5rem .8rem border: 1px solid var (--light-grey) transition: box-shadow .3s ease-in-out overflow: hidden border-radius: 12px !important background-color: rgb (239 241 243 ) &:before background var (--heo-post-blockquote-bg) position absolute right -26px top -120px content '\f25e' font-size 200px font-family 'Font Awesome 5 Brands' opacity .2 &:hover box-shadow: 0 0 8px 0 rgba (232 , 237 , 250 , .6 ), 0 2px 4px 0 rgba (232 , 237 , 250 , .5 ) .post-copyright &-meta color: $light-blue font-weight: bold &-info padding-left: .3rem a text-decoration: none word-break: break-word &:hover text-decoration: none .post-copyright-cc-info color: $theme-color; .post-outdate-notice position : relative margin: 0 0 1rem padding: .5em 1.2em border-radius: 15px background-color: $noticeOutdate-bg color: $noticeOutdate-color if hexo-config ('noticeOutdate.style' ) == 'flat' padding: .5em 1em .5em 2.6em border-left: 5px solid $noticeOutdate-border &:before @extend .fontawesomeIcon position: absolute top: 50% left: .9em color: $noticeOutdate-border content: '\f071' transform: translateY (-50% ) .ads-wrap margin: 2rem 0 .post-copyright-m-info .post-copyright-a, .post-copyright-c, .post-copyright-u display inline-block width fit-content padding 2px 5px [data-theme="dark" ] #post .post-copyright background-color #07080a text-shadow #bfbeb8 0 0 2px border 1px solid rgb (19 18 18 / 35% ) box-shadow 0 0 5px rgb (20 , 120 , 210 ) animation flashlight 1s linear infinite alternate .post-copyright-info color #e0e0e4 #post .post-copyright__title font-size 22px .post-copyright__notice font-size 15px .post-copyright box-shadow 2px 2px 5px @keyframes flashlight from box-shadow 0 0 5px rgb (20 , 120 , 210 ) to box-shadow 0 0 2px rgb (20 , 120 , 210 )
3.22 滚动条美化
效果见右侧滚动条
新建 Hexo\themes\butterfly\source\css\custom.css(css 文件名自定义)
1 2 3 4 5 6 7 8 9 10 11 12 13 14 15 16 17 18 19 20 21 ::-webkit-scrollbar { width : 10px ; height : 10px ; } ::-webkit-scrollbar-thumb { background-color : #49B1F5 ; background-image : -webkit-linear-gradient ( 45deg , rgba (255 , 255 , 255 , 0.4 ) 25% , transparent 25% , transparent 50% , rgba (255 , 255 , 255 , 0.4 ) 50% , rgba (255 , 255 , 255 , 0.4 ) 75% , transparent 75% , transparent); border-radius : 2em ; } ::-webkit-scrollbar-corner { background-color : transparent; } ::-moz-selection { color : #fff ; background-color : #49B1F5 ; }
在主题配置文件中引入:
1 2 3 4 inject: head: - <link rel="stylesheet" href="/css/custom/custom.css">
3.23 个性化浏览器标题
实现浏览器切到别的网页时显示特定文字,切回自己博客时显示特定文字2s。
新建 Hexo\themes\butterfly\source\js\custom.js(js 文件名自定义)
1 2 3 4 5 6 7 8 9 10 11 12 13 14 15 16 var OriginTitle = document .title ;var titleTime;document .addEventListener ('visibilitychange' , function ( if (document .hidden ) { $('[rel="icon"]' ).attr ('href' , "/img/favicon.ico" ); document .title = 'HalfA博客' ; clearTimeout (titleTime); } else { $('[rel="icon"]' ).attr ('href' , "/img/favicon.ico" ); document .title = '欢迎回来~~' + OriginTitle ; titleTime = setTimeout (function ( document .title = OriginTitle ; }, 2000 ); } });
在主题配置文件中引入:
1 2 3 4 5 inject: head: bottom: - <script src="/js/custom/custom.js"></script>
3.24 导航栏美化
参考:关于Butterfly的导航栏的一些教程 | Ariasakaの小窝 (yisous.xyz)
(1)分离搜索栏与菜单栏
修改[blogRoot]\themes\Butterfly\layout\includes\header\nav.pug:
1 2 3 4 5 6 7 8 9 10 11 12 13 14 15 16 17 18 19 20 21 22 nav#nav span#blog_name a#site-name(href=url_for('/')) #[=config.title] #menus - if (theme.algolia_search.enable || theme.local_search.enable) - #search-button - a.site-page.social-icon.search - i.fas.fa-search.fa-fw - span=' '+_p('search.title') !=partial('includes/header/menu_item', {}, {cache: true}) #nav-right + if (theme.algolia_search.enable || theme.local_search.enable) + #search-button + a.site-page.social-icon.search + i.fas.fa-search.fa-fw - #toggle-menu - a.site-page - i.fas.fa-bars.fa-fw + #toggle-menu + a.site-page + i.fas.fa-bars.fa-fw
(2)导航栏居中
在你的自定义css里面添加下面几句CSS:
1 2 3 4 5 6 7 #nav-right { flex :1 1 auto; justify-content : flex-end; margin-left : auto; display : flex; flex-wrap :nowrap; }
(3)去除导航栏底部的蓝条
添加如下的css
1 2 3 #nav *::after { background-color : transparent!important ; }
(4)子菜单横向布局
1 2 3 4 5 6 7 8 9 10 11 12 13 14 15 .menus_item_child li :not (#sidebar-menus li ){ float : left; border-radius : 6px !important ; -webkit-border-radius : 6px !important ; -moz-border-radius : 6px !important ; -ms-border-radius : 6px !important ; -o-border-radius : 6px !important ; } .menus_item_child :not (#sidebar-menus ul ){ left :50% ; translate:-50% ; }
(5)鼠标移动到左上角网站名称的悬浮动画
添加css
1 2 3 4 5 6 7 8 9 10 11 12 13 14 15 16 17 18 19 20 21 22 23 24 25 26 27 28 29 30 31 32 33 34 35 36 37 #site-name ::before { opacity : 0 ; background-color : var (--lyx-theme)!important ; border-radius : 8px ; -webkit-border-radius : 8px ; -moz-border-radius : 8px ; -ms-border-radius : 8px ; -o-border-radius : 8px ; transition : .3s ; -webkit-transition : .3s ; -moz-transition : .3s ; -ms-transition : .3s ; -o-transition : .3s ; position :absolute; top :0 !important ; right :0 !important ; width :100% ; height :100% ; content : "\f015" ; box-shadow : 0 0 5px var (--lyx-theme); font-family : "Font Awesome 6 Free" ; text-align : center; color :white; line-height :34px ; font-size : 18px ; } #site-name :hover ::before { opacity : 1 ; scale:1.03 ; } #site-name { position : relative; font-size : 24px ; } :root { --lyx-theme :#ed709b }
(6)导航栏顶栏常驻
添加css
1 2 3 4 5 6 7 8 9 10 11 12 13 14 .nav-fixed #nav { transform : translateY (58px )!important ; -webkit-transform : translateY (58px )!important ; -moz-transform : translateY (58px )!important ; -ms-transform : translateY (58px )!important ; -o-transform : translateY (58px )!important ; } #nav { transition : none!important ; -webkit-transition : none!important ; -moz-transition : none!important ; -ms-transition : none!important ; -o-transition : none!important ; }
(7)向上滑动显示导航栏,向下滑动显示文章名
修改[blogRoot]\themes\Butterfly\layout\includes\header\nav.pug
1 2 3 4 5 6 7 8 9 nav #nav span #blog_name a #site-name (href=url_for('/')) #[=config.title] #menus !=partial('includes/header /menu_item', {}, {cache: true}) + center(id="name-container") + a (id="page-name" href="javascript:scrollToTop ()") PAGE_NAME ...
添加nav.js,记得在主题配置文件中引用这个js文件
1 2 3 4 5 6 7 8 9 10 11 12 13 14 15 16 17 18 19 20 21 22 23 24 25 26 27 28 29 30 31 32 33 34 35 36 37 38 39 document .getElementById ("name-container" ).setAttribute ("style" , "display:none" );var position = $(window ).scrollTop ();$(window ).scroll (function ( var scroll = $(window ).scrollTop (); if (scroll > position) { document .getElementById ("name-container" ).setAttribute ("style" , "" ); document .getElementsByClassName ("menus_items" )[1 ].setAttribute ("style" , "display:none!important" ); } else { document .getElementsByClassName ("menus_items" )[1 ].setAttribute ("style" , "" ); document .getElementById ("name-container" ).setAttribute ("style" , "display:none" ); } position = scroll; }); function scrollToTop ( document .getElementsByClassName ("menus_items" )[1 ].setAttribute ("style" ,"" ); document .getElementById ("name-container" ).setAttribute ("style" ,"display:none" ); btf.scrollToDest (0 , 500 ); } document .getElementById ("page-name" ).innerText = document .title .split ("|" )[0 ];
最后添加如下css,按照注释修改参数:
1 2 3 4 5 6 7 8 9 10 11 12 13 14 15 16 17 18 19 20 21 22 23 24 25 26 27 28 29 30 31 32 33 34 35 36 37 38 39 40 41 42 43 44 45 46 47 48 49 50 #page-name ::before { font-size :18px ; position : absolute; width :100% ; height :100% ; border-radius : 8px ; color :white!important ; top :0 ; left :0 ; content :'回到顶部' ; background-color : var (--lyx-theme); transition : all .3s ; -webkit-transition : all .3s ; -moz-transition : all .3s ; -ms-transition : all .3s ; -o-transition : all .3s ; opacity : 0 ; box-shadow : 0 0 3px var (--lyx-theme); line-height : 45px ; } #page-name :hover :before { opacity : 1 ; } @media screen and (max-width :900px ){ #page-name ,#menus { display :none!important ; } } #name-container { transition : all .3s ; -webkit-transition : all .3s ; -moz-transition : all .3s ; -ms-transition : all .3s ; -o-transition : all .3s ; } #name-container :hover { scale:1.03 } #page-name { position : relative; padding :10px 30px } #nav { padding : 0 20px ; }
3.25 使用algolia搜索系统
参考:CSDN, Baret-H, Hexo集成Algolia实现搜索功能
(1)创建Algolia帐号并进行基本设置
进入Algolia官网 ,进入左下角Datasources,选择Indices,新建一个名为hexo的索引。
点击Setting-APIKeys,可以看到自己的API Key。
(2)hexo设置
安装algolia插件
1 npm install --save hexo-algolia
修改 hexo 站点根目录下的 _config.yml,最下方增加以下配置:
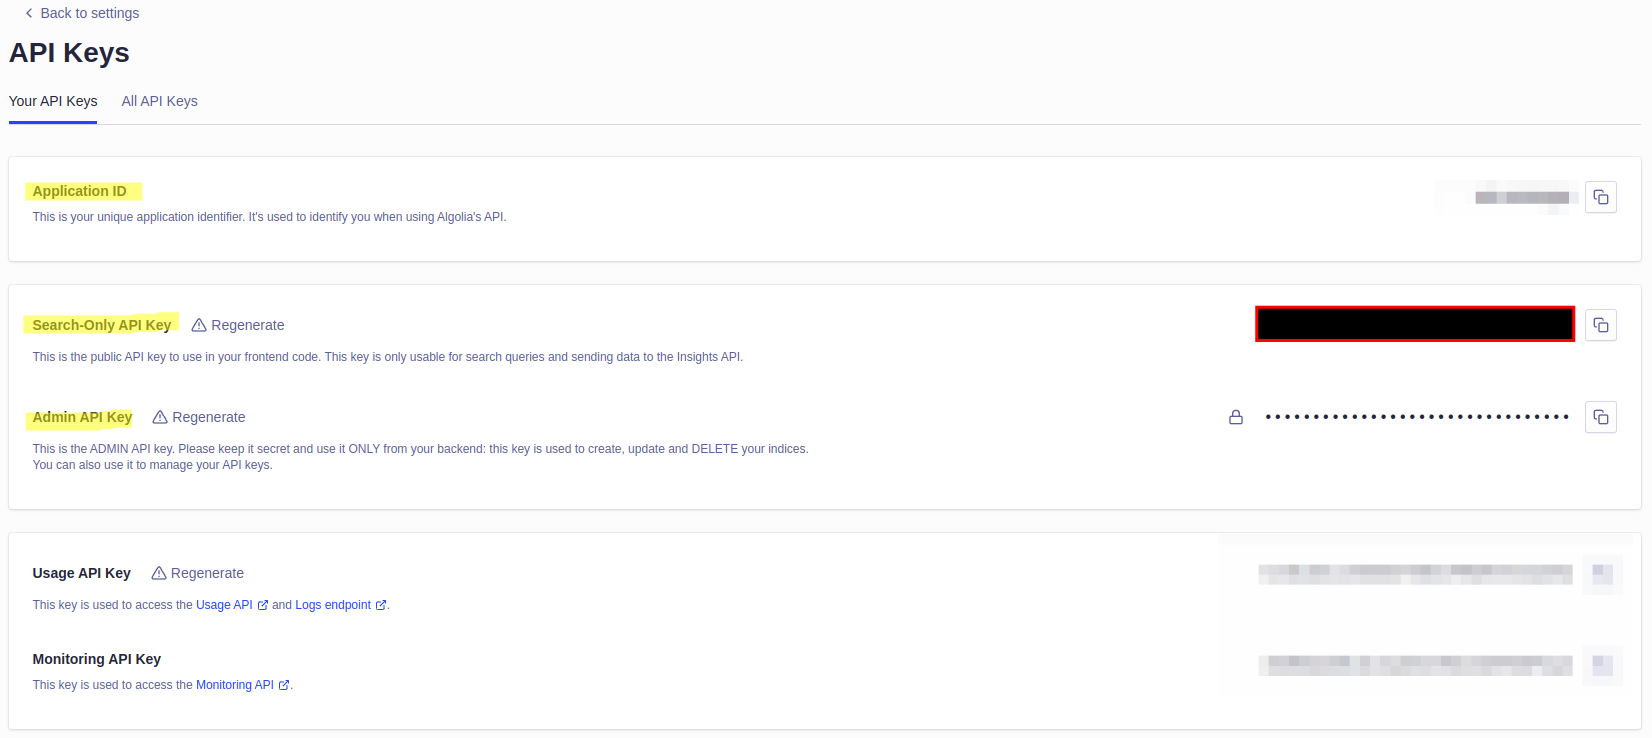
1 2 3 4 5 6 7 8 9 10 11 12 13 14 15 algolia: appId: '对应Application ID' apiKey: '对应Search-Only API Key' adminApiKey: "对应Admin API Key" chunkSize: 5000 indexName: 'hexo' fields: - content:strip:truncate,0,500 - excerpt:strip - gallery - permalink - photos - slug - tags - title
修改主题下的_config.yml,找到Algolia Search配置部分,将enable改为true(记得把local search改为false)
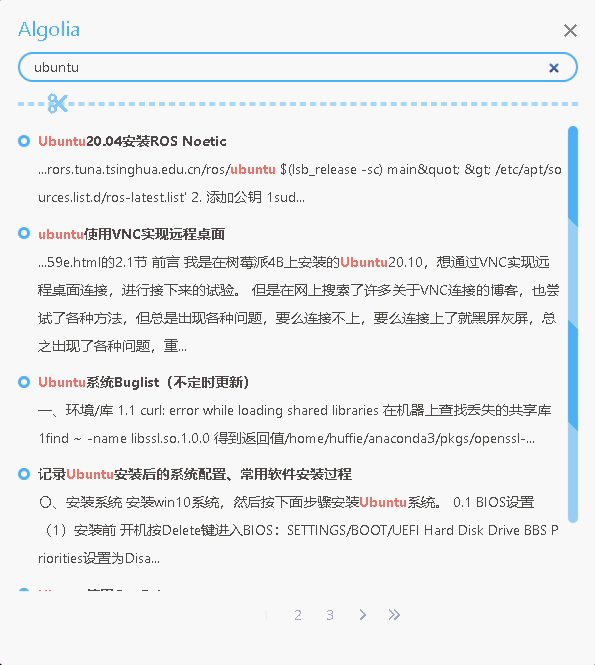
1 2 3 4 5 6 7 8 9 # Algolia search algolia_search: enable: true hits: per_page: 4 labels: # input_placeholder: Search for Posts hits_empty: "我们没有找到任何搜索结果: ${query}" hits_stats: "找到${hits}条结果(用时${time} ms)"
在hexo 站点根目录下执行hexo algolia 来搜集数据更新到我们刚创建的 Index 中
查看效果
(3)修改algolia样式
部署完成后,发现algolia没有滚动条,整个搜索结果直接延伸到屏幕最下方。
打开themes\butterfly\source\css\_search\algolia.styl,替换为如下内容:
1 2 3 4 5 6 7 8 9 10 11 12 13 14 15 16 17 18 19 20 21 22 23 24 25 26 27 28 29 30 31 32 33 34 35 36 37 38 39 40 41 42 43 44 45 46 47 48 49 50 51 52 53 54 55 56 57 58 59 60 61 62 63 64 65 66 67 68 69 70 71 72 73 74 75 76 77 78 79 80 81 82 83 84 85 86 87 88 89 90 91 92 93 94 95 96 97 98 99 100 101 102 103 104 105 106 107 #algolia-search .search-dialog .ais-SearchBox input padding : 5px 14px width: 100% outline: none border: 2px solid $search-color border-radius: 40px background: var (--search-bg) color: var (--search-input-color) .ais-Hits-list margin: 0 padding: 0 @extend .list-beauty a color: var (--search-result-title) font-weight: bold &:hover color: $search-color mark background: transparent color: $search-keyword-highlight font-weight: bold .algolia-hit-item-content margin: 0 0 5px word-break: break-all .ais-Pagination margin: 10px 0 height: 35px padding: 0 text-align: center .ais-Pagination-list margin: 0 padding: 0 list-style: none .ais-Pagination-item display: inline margin: 0 4px padding: 0 .ais-Pagination-link display: inline-block min-width: 24px height: 24px text-align: center line-height: 24px .ais-Pagination-item--selected a background: var (--leonus-main) color: #eee cursor: default border-radius: 5px .ais-Pagination-item--disabled visibility: hidden .algolia-logo padding-top: 2px width: 80px height: 30px #algolia-hits > div overflow-y: scroll +minWidth768 () max-height: calc (80vh - 240px ) +maxWidth768 () max-height: calc (100vh - 260px ) max-height: calc (100 dvh - 200px ) #algolia-info display: flex justify-content: space-between align-items: center height: 30px .algolia-stats font-size: 14px .algolia-poweredBy display: flex; justify-content : right; width : 90px overflow: hidden; .ais-PoweredBy a display :flex justify-content: space-between align-items: center .ais-PoweredBy-logo path:first-child display: none .ais-PoweredBy-logo path:nth-child (2 ), .ais-PoweredBy-logo path:nth-child (4 ) fill: var (--leonus-main)
3.26 高德地图
在关于页面添加高德地图。
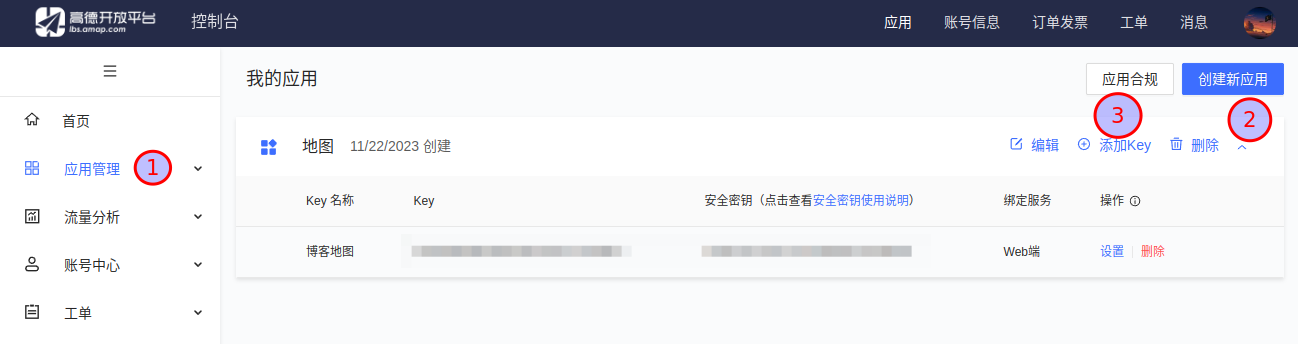
(1)Key申请
进入高德控制台 ,填创建一个应用,应用名称随便。
再在该应用下面创建一个Key,Key的名称也随便。
(2)获取地图代码
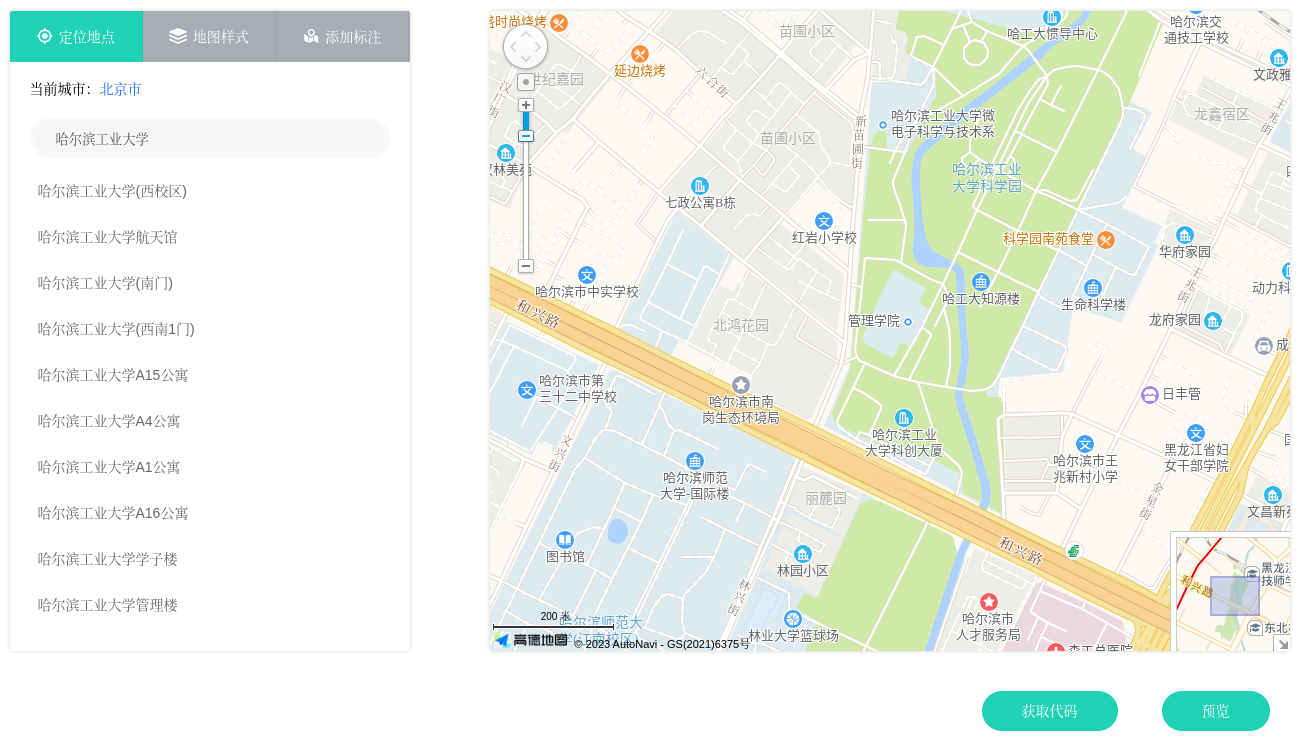
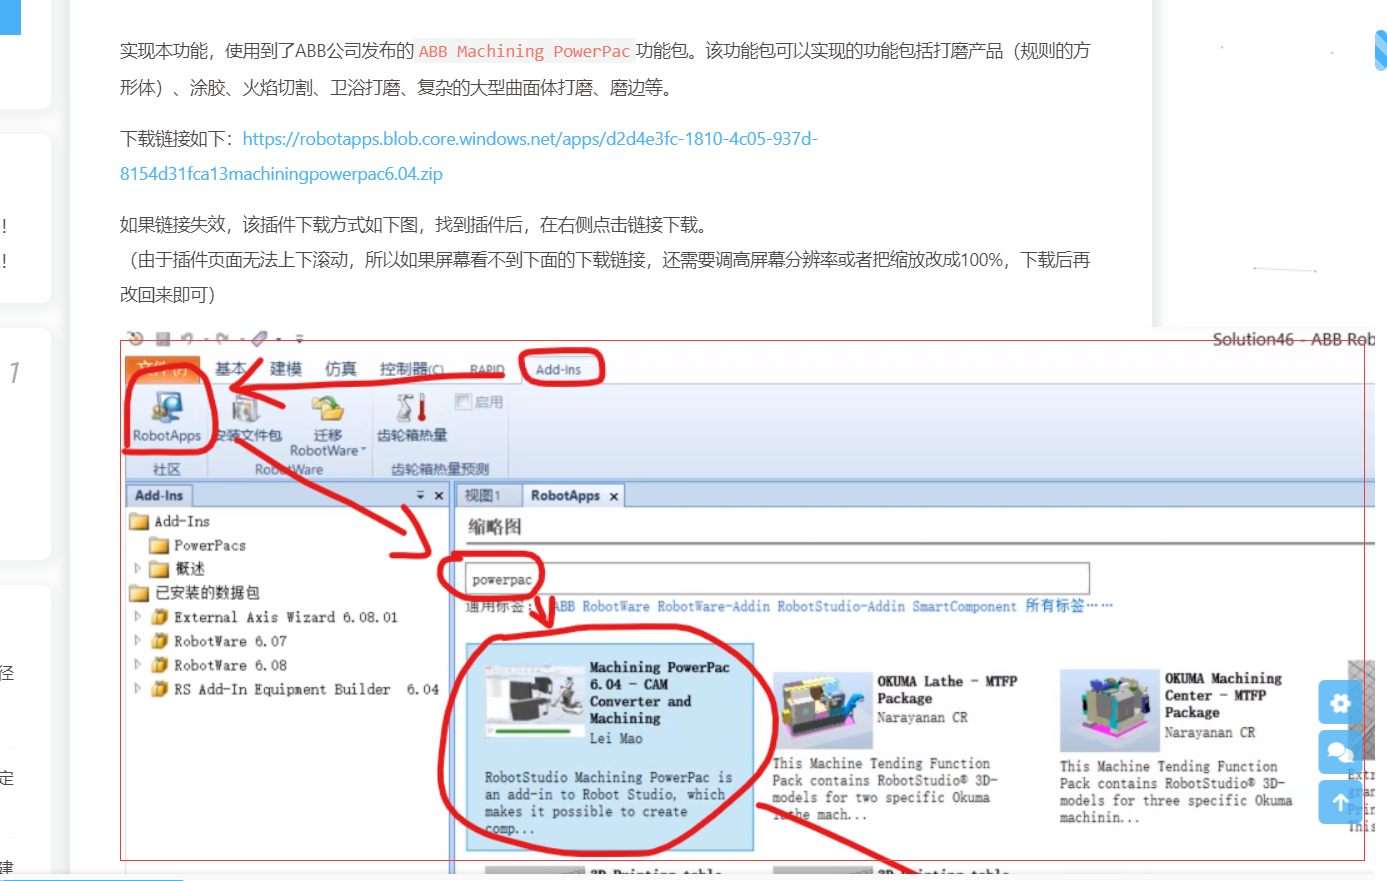
打开高德开放平台 ,输入自己想要定位的位置。快速生成代码。
(2)添加地图
在你想要添加的页面中(html、md文件中都行)的位置,加入刚才获得的代码,注意修改安全密钥和Key。
以下是我的格式参考,设置了固定高度和宽度自适应。增加了一个标记点。
1 2 3 4 5 6 7 8 9 10 11 12 13 14 15 16 17 18 19 20 21 22 23 24 25 26 27 28 29 30 31 32 33 <div id ="wrapper" > </div > <div style ="text-align: center;" > <div id ="container" style ="width:100%;height:300px; margin: 0 auto;" > </div > </div > <script type ="text/javascript" > window ._AMapSecurityConfig = { securityJsCode :'你的安全密钥' , } </script > <script type ="text/javascript" src ="https://webapi.amap.com/maps?v=1.4.15&key=你的Key" > </script > <script > var map = new AMap .Map ("container" , { zoom : 16 , center : [126.631012 ,45.728771 ] }); var marker = new AMap .Marker ({ position : new AMap .LngLat (126.63101189821958 , 45.72887148273063 ), title : "机器人技术与系统国家重点实验室" }); map.add (marker); marker.setLabel ({ offset : new AMap .Pixel (0 , 15 ), content : "<div class='info'>机器人技术与系统国家重点实验室</div>" , direction : 'right' }); </script >
四、网站优化
4.1 链接预加载
当鼠标悬停到链接上超过65毫秒时,instantpage会对该链接进行预加载,提升访问速度。
4.2 SEO优化
优化链接
采用hexo-abbrlink插件实现链接,后期不管怎么修改永久链接都不会变,不用考虑分类中文化的问题,并且更利于SEO。
1 npm install hexo-abbrlink --save
配置站点文件config.yml
1 2 3 permalink: post/:abbrlink.html alg: crc32 rep: hex
生成新的站点地图
1 2 npm install hexo-generator-sitemap --save npm install hexo-generator-baidu-sitemap --save
百度资源平台管理站点
打开百度搜索资源平台 ,进入【用户中心-站点管理-添加网站】,按照流程添加网站。
在验证阶段选择HTML标签验证 ,将content内容填入主题配置文件site_verification处部署后点击完成验证。
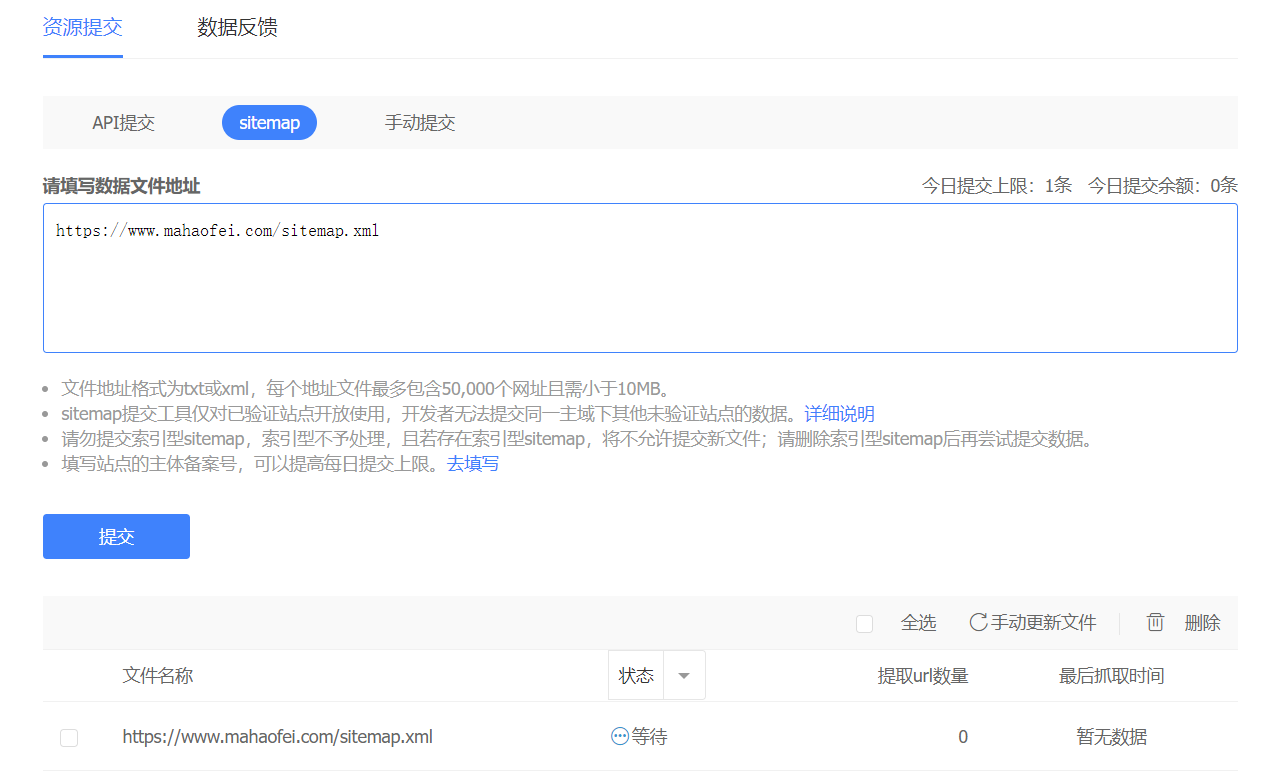
验证成功后,点击普通提交,首先提交sitemap
然后如果想百度收录的更加及时,可以再配置API提交,首先需要安装额外的插件。
1 npm install hexo-baidu-url-submit --save
修改站点配置
1 2 3 4 5 deploy: - type: git repo: https://github.com//xxx.github.io.git branch: main - type: baidu_url_submitter
添加站点配置
1 2 3 4 5 baidu_url_submit: count: 100 host: https://www.mahaofei.com token: xR6nigjGWFHyybFO path: baidu_urls.txt
此后每次 hexo d都会进行API提交
谷歌收录
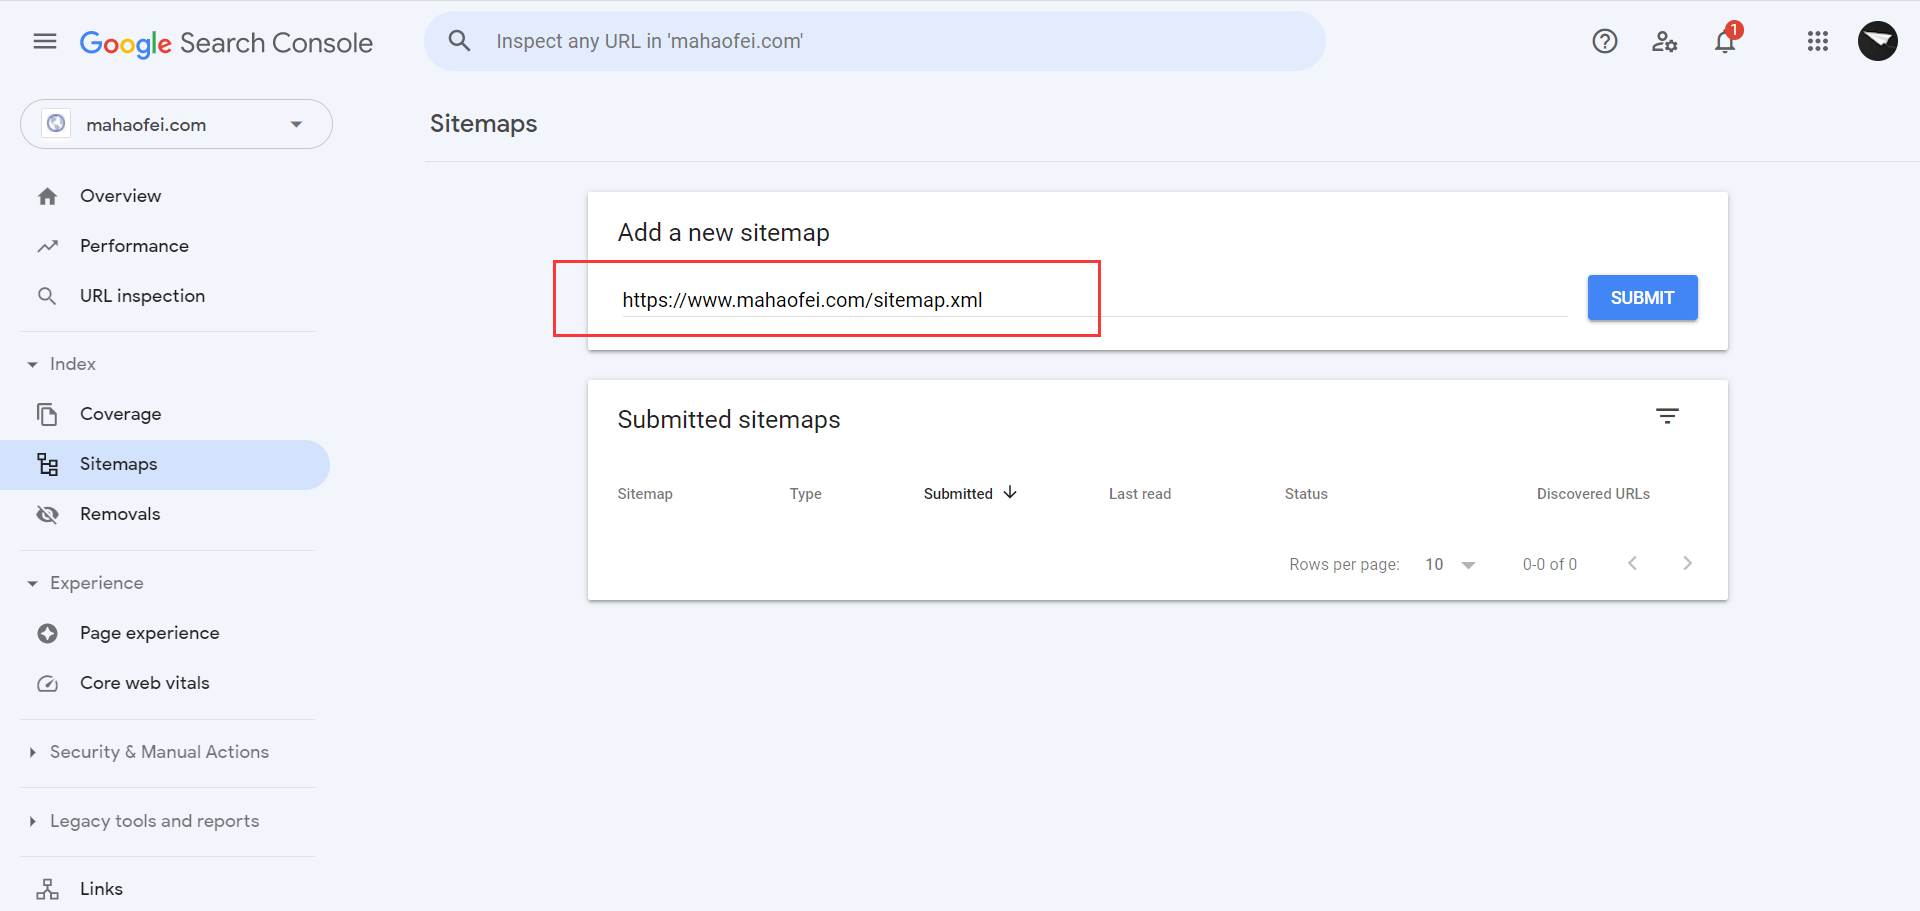
进入Google Search Console ,进行网站验证
验证成功后,进入配置页面,点击Sitemaps ,提交自己的Sitemap文件就可以了。
五、博客撰写
3.1 页面配置Page Front-matter
1 2 3 4 5 6 7 8 9 10 11 --- title: date: updated: type: comments: description: keywords: top_img: katex: ---
写法
解释
title
【必需】页面标题
date
【必需】页面创建日期
type
【必需】标签、分类和友情链接三个页面需要配置
updated
【可选】页面更新日期
description
【可选】页面描述
keywords
【可选】页面关键字
comments
【可选】显示页面评论模块(默认true)
top_img
【可选】页面顶部图片
mathjax
【可选】显示mathjax(当设置mathjax的per_page: false时,才需要配置,默认false)
katex
【可选】显示katex(当设置katex的per_page: false时,才需要配置,默认false)
aside
【可选】显示侧边栏(默认true)
aplayer
【可选】在需要的页面加载aplayer的js和css,请参考文章下面的音樂 配置
highlight_shrink
【可选】配置代码框是否展开(true/false)(默认为设置中highlight_shrink的配置)
3.2 文章页配置
1 2 3 4 5 6 7 8 9 10 11 12 13 14 15 16 17 18 19 20 21 22 23 24 25 26 --- title: date: updated: tags: categories: keywords: description: top _img: comments: cover: toc: toc_ number: toc _style_ simple: copyright: copyright _author: copyright_ author _href: copyright_ url: copyright _info: mathjax: katex: aplayer: highlight_ shrink: aside: stick: ---
写法
解释
title
【必需】文章标题
date
【必需】文章创建日期
updated
【可选】文章更新日期
tags
【可选】文章标签
categories
【可选】文章分类
keywords
【可选】文章关键字
description
【可选】文章描述
top_img
【可选】文章顶部图片
cover
【可选】文章缩略图(如果没有设置top_img,文章页顶部将显示缩略图,可设为false/图片地址/留空)
comments
【可选】显示文章评论模块(默认true)
toc
【可选】显示文章TOC(默认为设置中toc的enable配置)
toc_number
【可选】显示toc_number(默认为设置中toc的number配置)
toc_style_simple
【可选】显示toc 简洁模式
copyright
【可选】显示文章版权模块(默认为设置中post_copyright的enable配置)
copyright_author
【可选】文章版权模块的文章作者
copyright_author_href
【可选】文章版权模块的文章作者链接
copyright_url
【可选】文章版权模块的文章連結链接
copyright_info
【可选】文章版权模块的版權聲明文字
mathjax
【可选】显示mathjax(当设置mathjax的per_page: false时,才需要配置,默认false)
katex
【可选】显示katex(当设置katex的per_page: false时,才需要配置,默认false)
aplayer
【可选】在需要的页面加载aplayer的js和css,请参考文章下面的音樂 配置
highlight_shrink
【可选】配置代码框是否展开(true/false)(默认为设置中highlight_shrink的配置)
aside
【可选】显示侧边栏(默认true)
stick
【可选】文章置顶(默认0不置顶,设置1时置顶)
3.3 Butterfly主题可用功能
Tag Inline
类似于查题网站,点击查看答案按钮,显示答案
https://butterfly.js.org/posts/4aa8abbe/#tag-hide
mermail
使用mermaid标签可以绘制Flowchart(流程图)、Sequence diagram(时序图)、Class Diagram(类别图)、State Diagram(状态图)、Gantt(甘特图)和Pie Chart(圆形图)
https://butterfly.js.org/posts/4aa8abbe/#mermaid
Tabs
1 2 3 4 5 6 7 8 9 10 11 12 13 {% tabs test4 %} <!-- tab 第一个Tab --> **tab名字为第一个Tab** <!-- endtab --> <!-- tab @fab fa-apple-pay --> **只有图标没有Tab名字** <!-- endtab --> <!-- tab 炸弹@fas fa-bomb --> **名字+icon** <!-- endtab --> {% endtabs %}
Button
1 2 3 4 5 6 7 8 9 10 11 12 13 14 15 16 {% btn [url],[text],[icon],[color] [style] [layout] [position] [size] %} [url] : 链接 [text] : 按钮文字 [icon] : [可选] 图标 [color] : [可选] 按钮背景颜色(默认style时) 按钮字体和边框颜色(outline时) default/blue/pink/red/purple/orange/green [style] : [可选] 按钮样式默认实心 outline/留空 [layout] : [可选] 按钮布局默认为line block/留空 [position] : [可选] 按钮位置前提是设置了layout为block 默认为左边 center/right/留空 [size] : [可选] 按钮大小 larger/留空
inlineImg
1 2 3 4 {% inlineImg [src] [height] %} [src] : 图片链接 [height] : 图片高度限制【可选】
label
高亮所需的文字
1 2 3 4 {% label text color %} [text] : 文字 [color] : 【可选】背景颜色,默认为default default/blue/pink/red/purple/orange/green
timeline
1 2 3 4 5 6 7 8 9 10 11 12 {% timeline title,color %} <!-- timeline title --> xxxxx <!-- endtimeline --> <!-- timeline title --> xxxxx <!-- endtimeline --> {% endtimeline %} [title] : 标题/时间线 [color] : timeline 颜色 default(留空) / blue / pink / red / purple / orange / green
flink
可在任何界面插入类似友情链接列表效果
1 2 3 4 5 6 7 8 9 10 11 12 13 14 15 16 17 18 19 20 21 22 23 24 25 26 27 28 29 {% flink %} - class _name: 友情链接 class_ desc: 那些人,那些事 link _list: - name: JerryC link: https://jerryc.me/ avatar: https://jerryc.me/img/avatar.png descr: 今日事,今日毕 - name: Hexo link: https://hexo.io/zh-tw/ avatar: https://d33wubrfki0l68.cloudfront.net/6657ba50e702d84afb32fe846bed54fba1a77add/827ae/logo.svg descr: 快速、简单且强大的网志框架 - class_ name: 网站 class _desc: 值得推荐的网站 link_ list: - name: Youtube link: https://www.youtube.com/ avatar: https://i.loli.net/2020/05/14/9ZkGg8v3azHJfM1.png descr: 视频网站 - name: Weibo link: https://www.weibo.com/ avatar: https://i.loli.net/2020/05/14/TLJBum386vcnI1P.png descr: 中国最大社交分享平台 - name: Twitter link: https://twitter.com/ avatar: https://i.loli.net/2020/05/14/5VyHPQqR6LWF39a.png descr: 社交分享平台 {% endflink %}
六、部分bug
6.1 文章图片过大超出页面
直接截屏以![]()格式插入的图片,在文章页面会超出边框。
解决方法:找到butterfly\source\css\_layout\post.styl,找到其中的#article-container样式,修改其中的img为如下
1 2 3 4 5 img display : block margin : 0 auto .8rem height : auto max-width : 100%
七、自定义页面
7.1 如何创建自定义页面
在站点目录下的/source目录下新建一个custom文件夹(文件夹名字可以自定义),在其中添加写好的index.html文件(关于js、css文件的位置可以在同一目录,也可以放于其他位置,只要保证index.html引用到就好)
找到主题配置文件_config.butterfly.yml,在menu位置中添加页面的连接自定义: /custom/ || fas fa-gift
找到主题配置文件_config.yml,在skip_render位置添加属性
1 2 skip_render: - custom/**
博客备份
==不建议在通过这种方式备份博客了,因为会将所有博客源代码开源==
创建新分支
不过在建立新分支前请确保仓库内已有master分支 (Hexo本地建站后第一次上传时会自动生成)。
获取 .git文件夹
原始的博客文件夹只有.deploy_git文件夹,是没有.git文件夹的,于是我们先去桌面或者哪里随便一个地方,把刚刚的hexo分支给clone下来。然后复制出里面的.git文件夹,复制到现在的博客文件夹中。
在博客文件夹中检查是否有.gitignore文件,如果没有最好手动添加一个,用于上传时忽略一些不必要的文件
1 2 3 4 5 6 7 .DS_Store Thumbs.db db.json *.log node_modules/ public/ .deploy*/
注意 :如果你之前克隆过theme中的主题文件,那么应该把主题文件中的.git文件夹删掉,因为git不能嵌套上传,最好是显示隐藏文件,检查一下有没有,否则上传的时候会出错,导致你的主题文件无法上传,这样你的配置在别的电脑上就用不了了。
备份博客
通过如下命令将本地文件备份到Github上。
在hexo博客的根目录下执行
1 2 3 git add . git commit -m "Backup" git push origin hexo
恢复博客
目前假设本地Hexo博客基础环境已经搭好:比如安装git
输入下列命令克隆博客必须文件(hexo分支):
1 git clone https://github.com/yourgithubname/yourgithubname.github.io
在clone下来的那个文件夹里面执行
1 2 npm install hexo-cli npm install hexo-deployer-git
不需要执行hexo init,直接继续安装原来安装的一些插件,然后就完成了
博客搭建
安装必备组件
(1)NodeJS
在官网下载安装:https://nodejs.org/en/download/
(2)Git
在官网下载安装:https://git-scm.com/download/win
检测Git是否安装成功,打开CMD窗口,输入下面的命令看是否有信息输出:
1 2 3 git --version node -v npm -v
安装Hexo
(1)安装Hexo
新建一个文件夹,重命名为Blog,博客相关的文件将存储在这个文件夹下。
空白区域右键,点击Git Bash Here,输入下面的命令安装即可
1 2 npm install hexo-cli -g npm install hexo-deployer-git --save
(2)初始化Hexo
将自己的Hexo文件夹复制过来。
或者在该文件夹下再新建一个文件夹名为Hexo,进入该文件夹后右键点击Git bash here,输入hexo init完成初始化。
完成后可以使用hexo g && hexo s查看效果。
配置Git
(1)生成SSH密钥
在Blog文件夹下右键Git bash here,输入下面的命令
1 ssh-keygen -t rsa -C "your email@example.com"
使用下面的命令将密钥复制到剪切板
1 clip < ~/.ssh/id_rsa.pub
(2)在Github上添加公钥
打开Github,找到【右上角个人头像 -> Settings -> SSH and GPG keys -> New SSH key】,Title随便填,Key填刚复制的密钥。
使用下面的命令测试密钥是否配置成功:(注意git@github.com不要更改,就是这个)
(3)配置Git个人信息
1 2 git config --global user.name "此处填你的用户名" git config --global user.email "此处填你的邮箱"
(4)本地配置
复制Github上的博客项目的SSH链接,添加到Hexo\_config.yml中的deploy处。
然后使用下面的命令部署
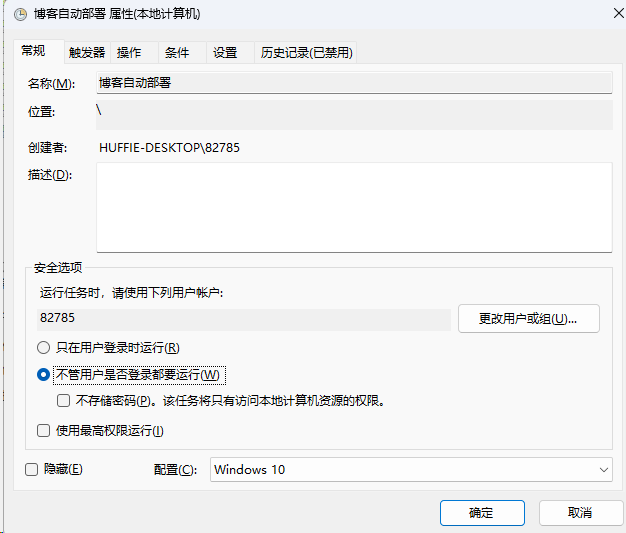
博客自动部署
(1)创建一个.bat文件
在任意一个目录创建一个.bat批处理程序,用于执行自动部署命令。内容如下:
1 2 3 4 5 @echo off del /s /q "D:\Documents\Blog\Hexo\source\_posts\" xcopy /e /y "D:\Documents\OneDrive\Documents\Obsidian\HUFFIE NOTES\01 博客" "D:\Documents\Blog\Hexo\source\_posts\" start "" "D:\Software\Programming\Git\git-bash.exe" -c "cd D:/Documents/Blog/Hexo;hexo clean;hexo g;hexo d;bash" exit
命令实现的功能为:
删除博客内的所有文章
从OneDrive的目录中将博客文章复制过来(因为我一般都用OneDrive编辑和同步我的文件,所以每次上传需要从OneDrive中复制最新的内容过来)
运行git bash,并执行命令cd和hexo三件套
注意,如果路径中存在中文,需要将.bat文件另存为ANSI格式。
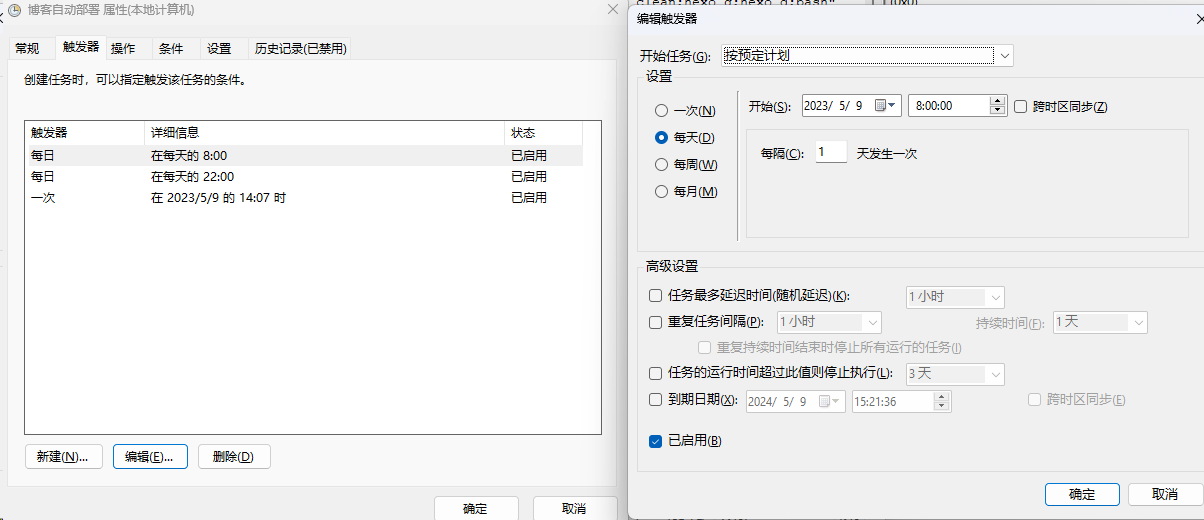
(2)创建任务计划程序
打开Windows的任务计划程序,右键任务计划程序库,创建任务
Github/Gitee双部署
(1)新建仓库
新建一个宇自己的用户名相同的仓库,例如我的用户名为@HaofeiMa,那么就新建一个名为HaofeiMa的仓库,新建后仓库的地址应该为https://gitee.com/HaofeiMa/HaofeiMa,这样部署好之后就可以用haofeima.gitee.io进行访问。
在仓库设置页面
(2)配置SSH-Key
找到自己之前生成的sshkey,目录为C:\Users\用户名\.ssh\id_rsa.pub
到Gitee的SSH keys页面 添加一个 key。
(3)配置_config.yml
在hexo根目录的_config.yml中进行配置仓库地址,如下
1 2 3 4 5 6 deploy: - type: git repo: github: git@github.com:HaofeiMa/HaofeiMa.github.io.git gitee: git@gitee.com:HaofeiMa/HaofeiMa.git branch: master
(4)首次推送并配置Gitee Pages
执行hexo g -d将博客推送至Github和Gitee。
在Gitee仓库页面点击服务 -> Gitee Pages -> 勾选'强制使用HTTPS' -> 启动
(5)设置自动部署
Gitee Pages 无法实现自动部署,只能在Gitee Pages 页面手动点击更新。除非购买¥99的 Gitee Pages Pro。
考虑使用Github的workflows实现自动部署。
在自己的Github的Hexo仓库中新建.github/workflows/sync.yml文件,内容填写如下:
1 2 3 4 5 6 7 8 9 10 11 12 13 14 15 16 17 18 19 20 21 22 name: Sync on: push: branches: - master jobs: build: runs-on: ubuntu-latest steps: - name: Build Gitee Pages uses: yanglbme/gitee-pages-action@main with: gitee-username: HaofeiMa gitee-password: ${{ secrets.GITEE_PASSWORD }} gitee-repo: HaofeiMa/HaofeiMa branch: master
在该仓库的Setting -> Secrets and variables -> Actions在最下方添加一个Repository secrets。
Name: GITEE_PASSWORD
Secret: 自己的Gitee密码
完成后等待Github Action自动部署即可。


 微信支付
微信支付 支付宝
支付宝